DIY Projects
Cutlery Holder
04—July 2023
This DIY project will store your on-the-go cutlery and help you avoid plastic takeaway utensils, plus you get to choose playful colour combos!
We came across this DIY tutorial from Melbourne-based creator Connie Cao (Connie and Luna) over on Instagram, perfect timing for Plastic Free July! Plastic Free July is a global movement that helps millions of people be part of the solution to plastic pollution so we can have cleaner streets, oceans, and beautiful communities. Over on the Plastic Free July website, you'll find resources and ideas to help you reduce single-use plastic waste every day.
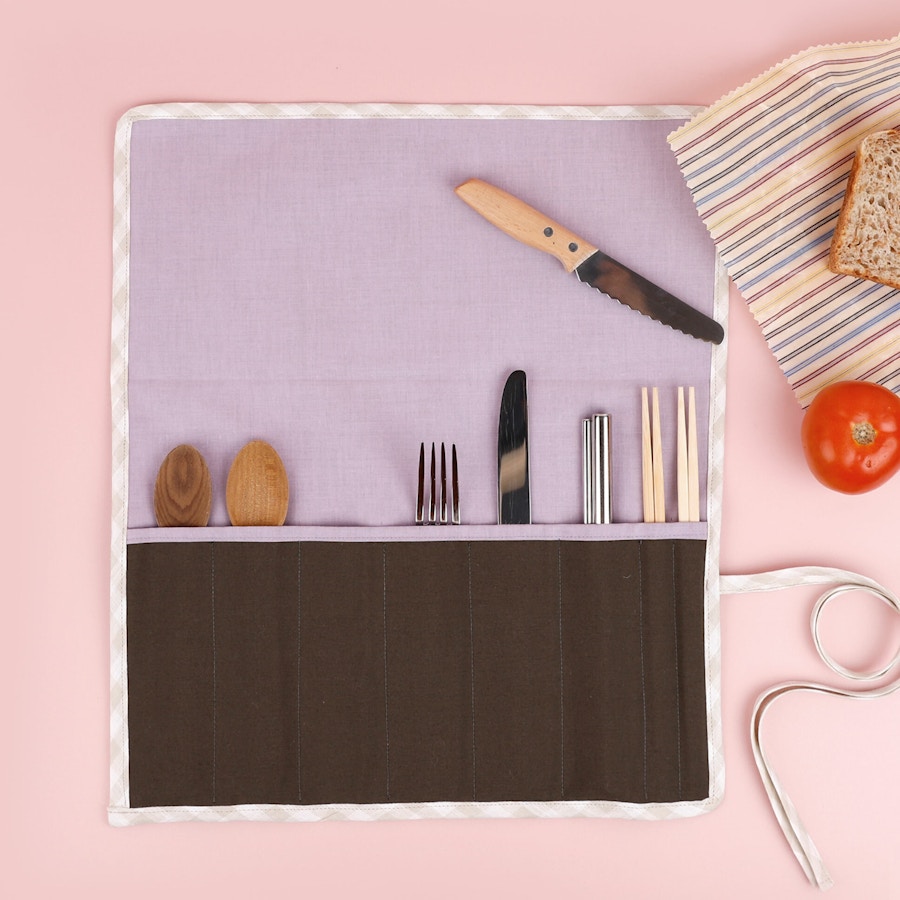
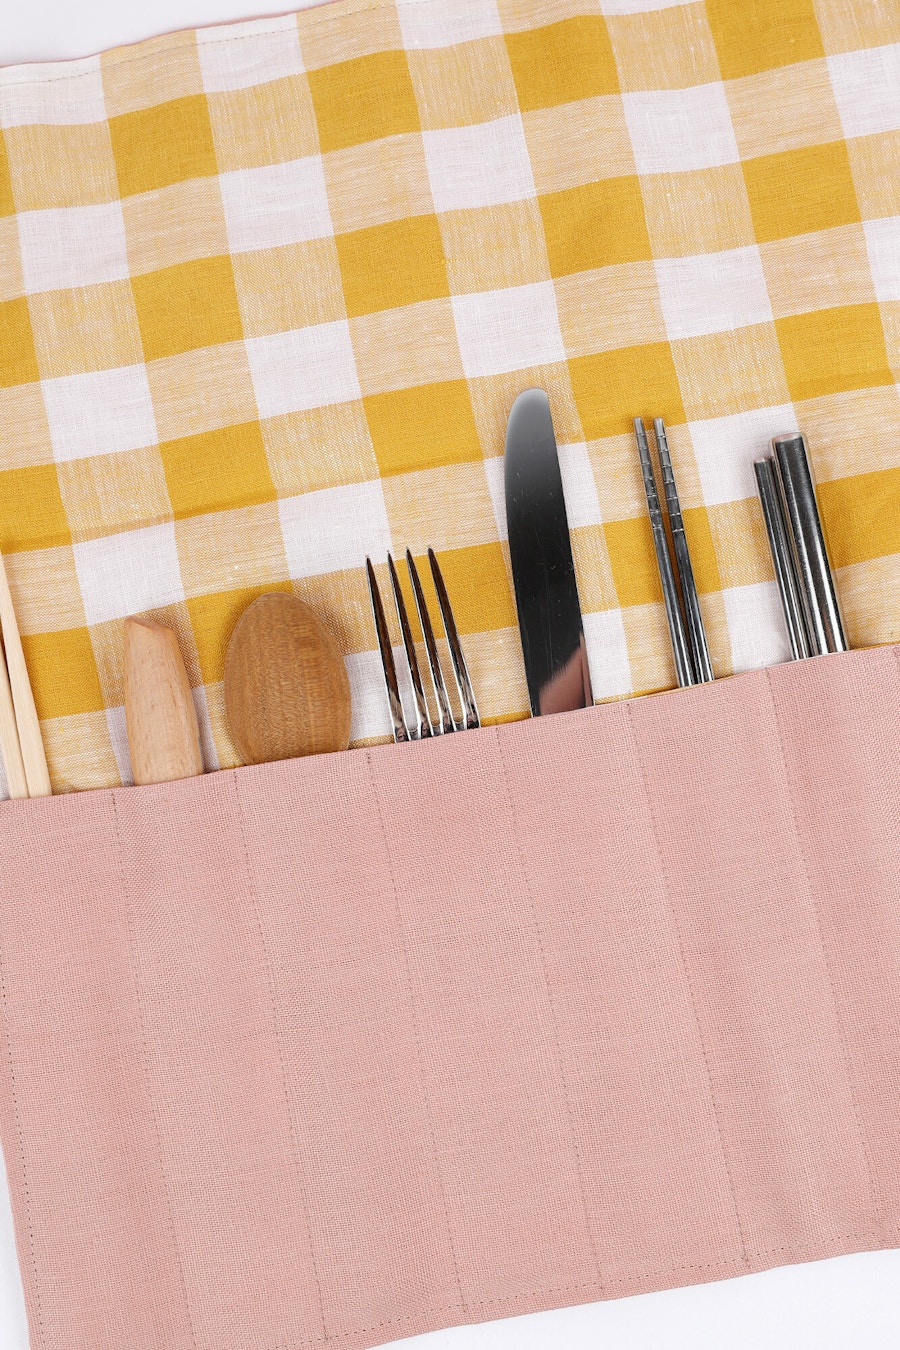
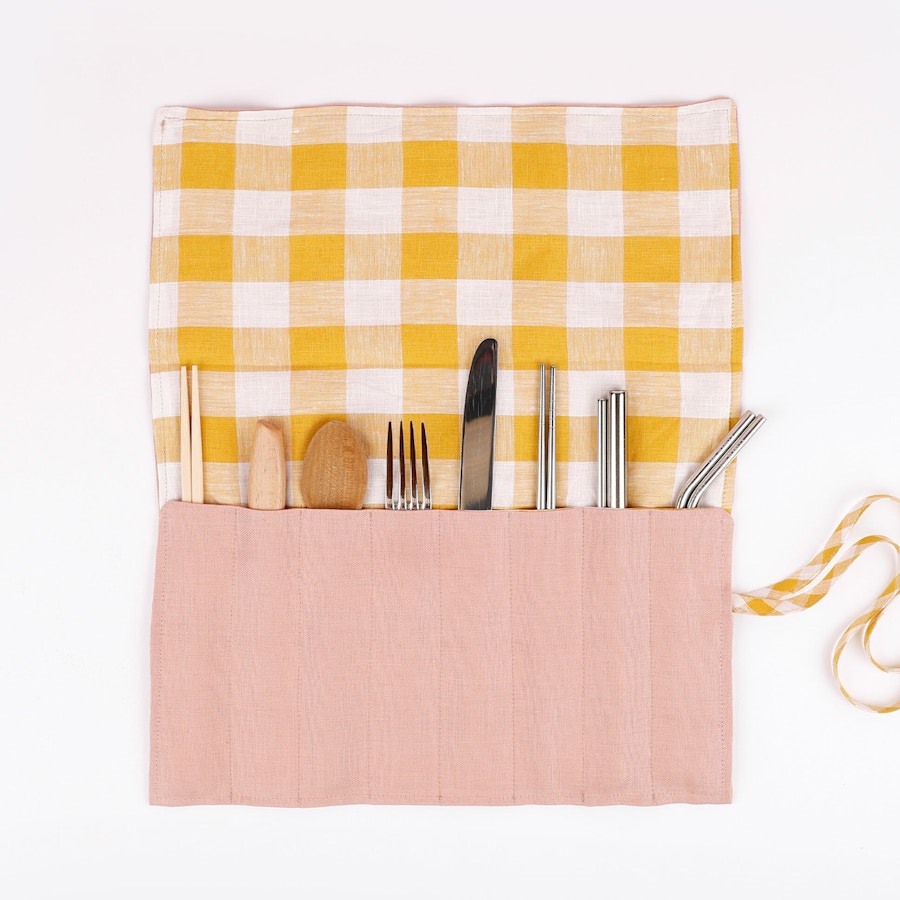
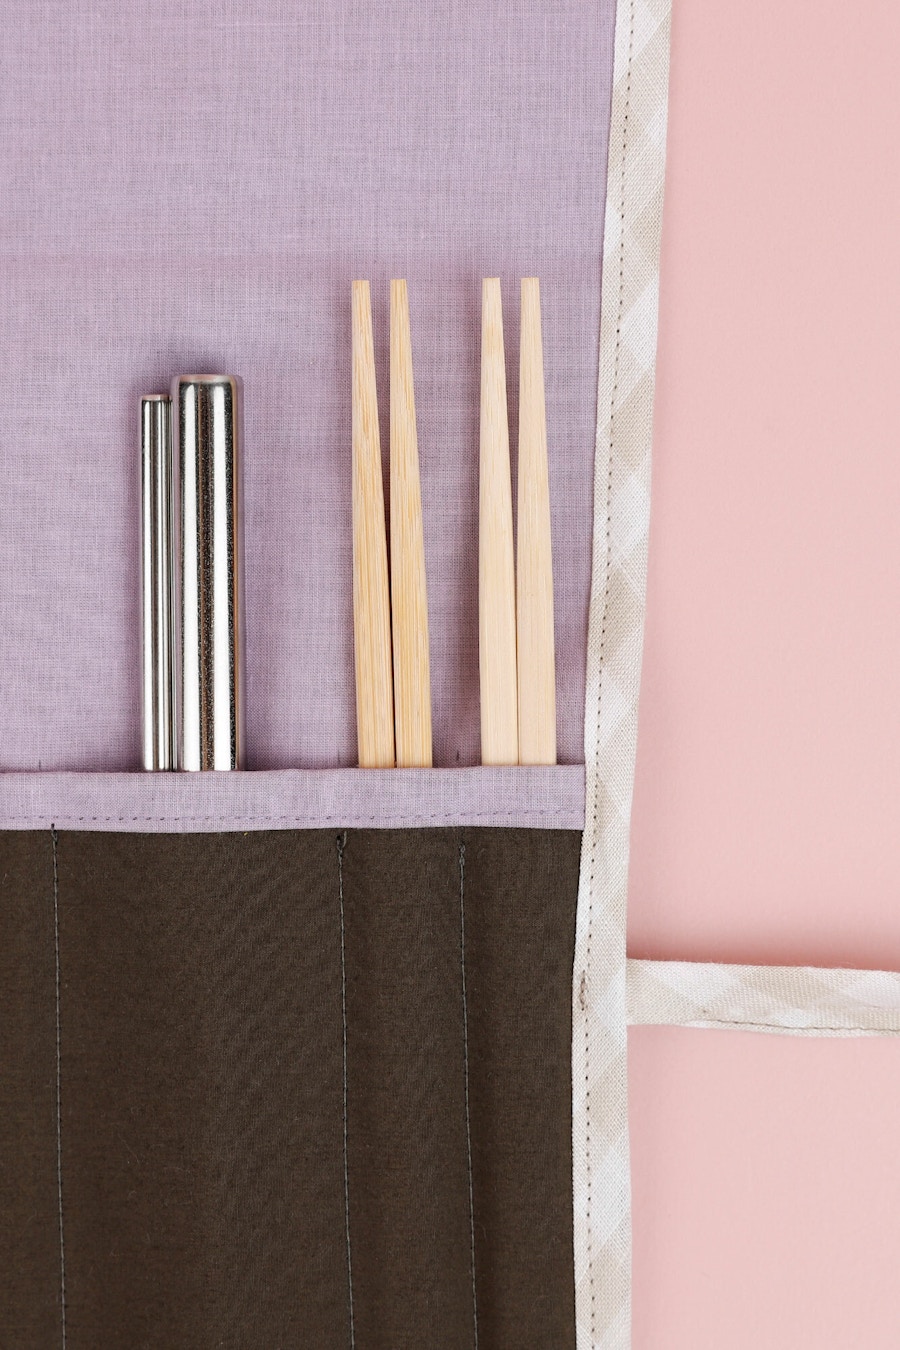
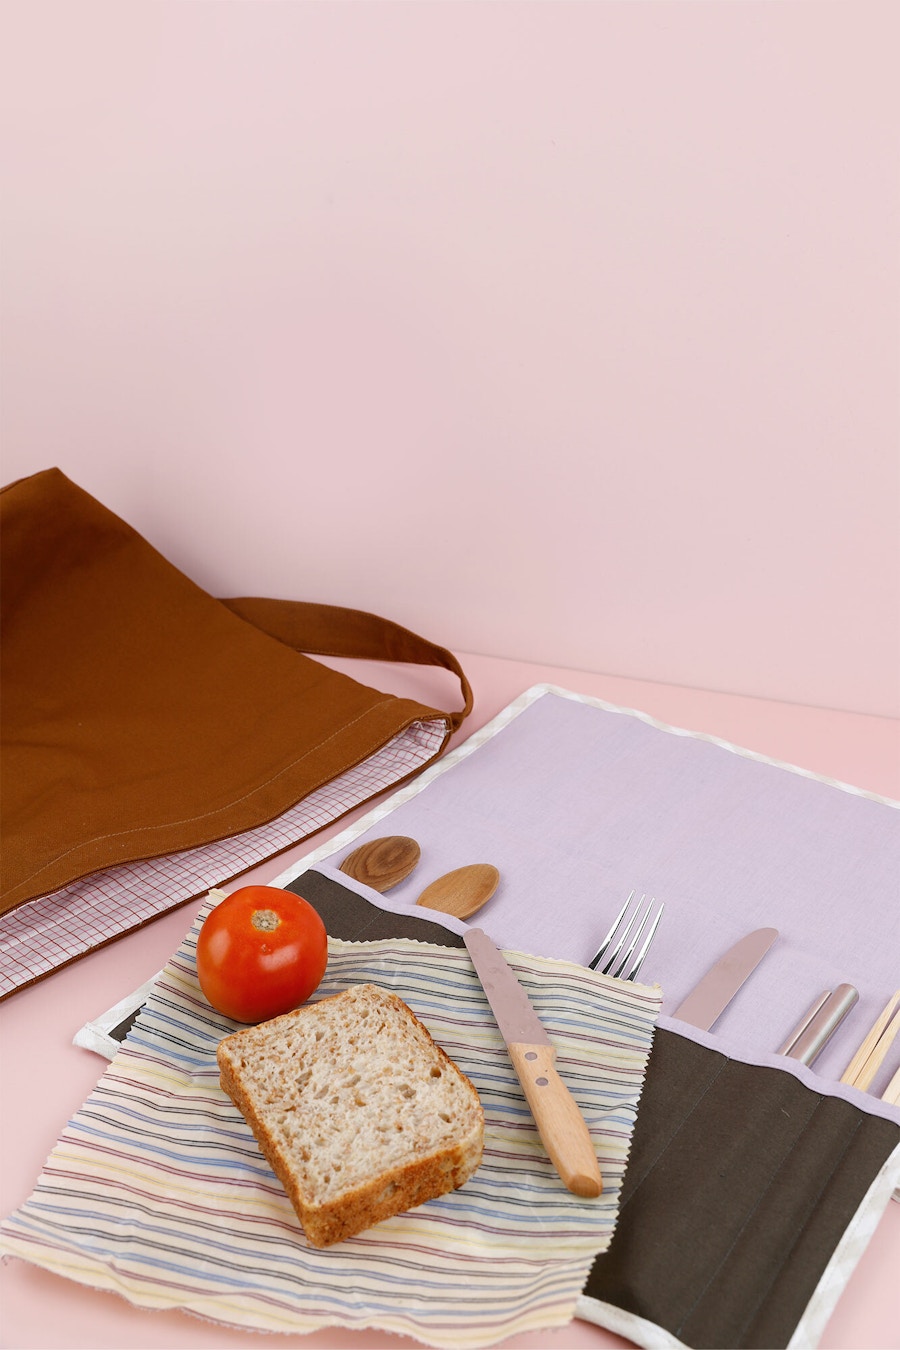
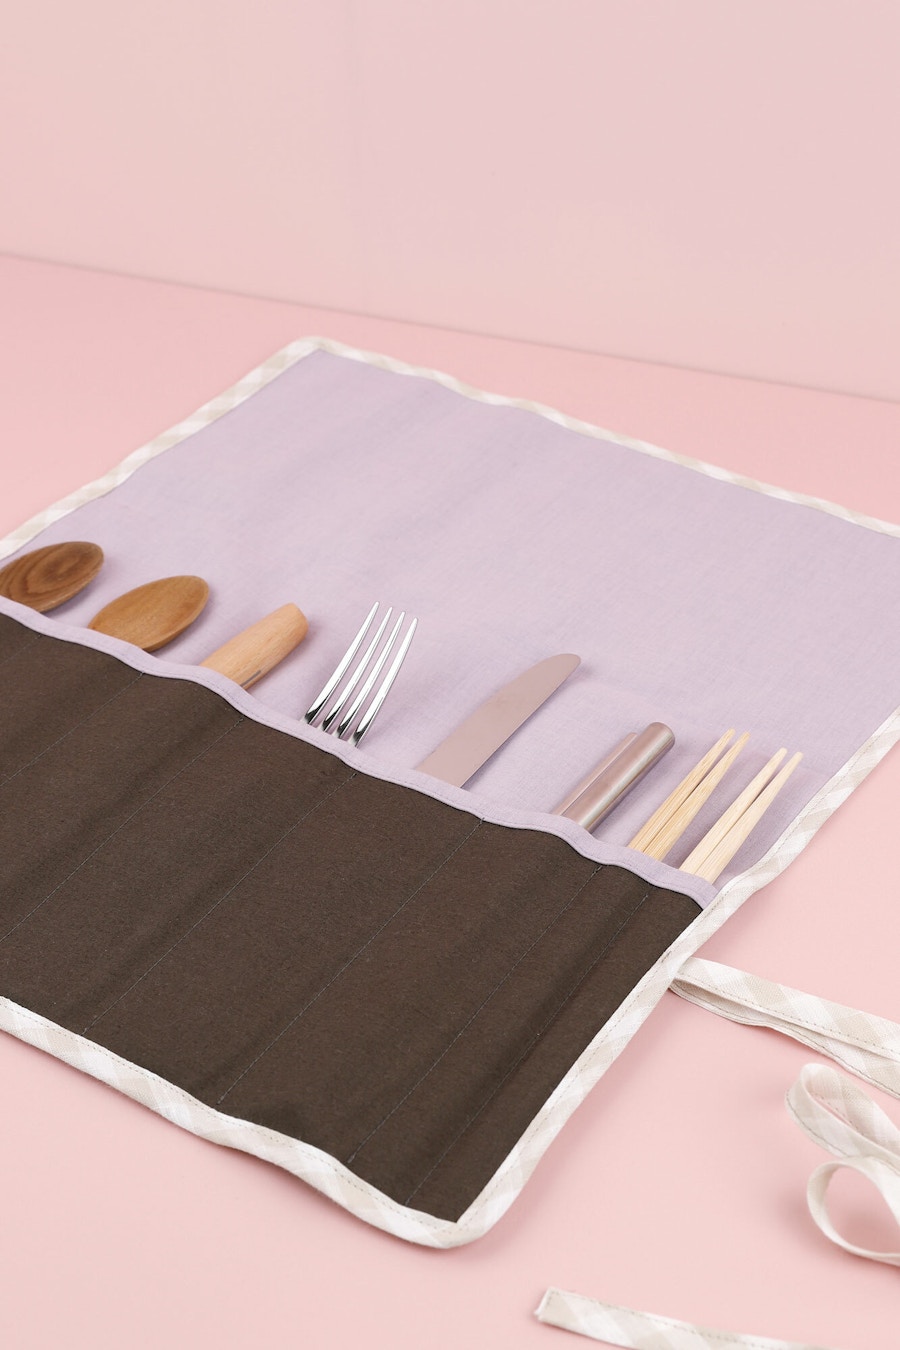
Cue the DIY cutlery roll! These roll-up utensil holders are a super handy way to organise for work/school lunches and picnic adventures, as well as being great gifts for DIY lovers. Projects like this not only give you the chance to make use of fun scrap colour combos but also provide a practical alternative to avoiding plastic takeaway cutlery on the go, which we love! Read on for fabric recommendations, tools and supplies, and the DIY process.
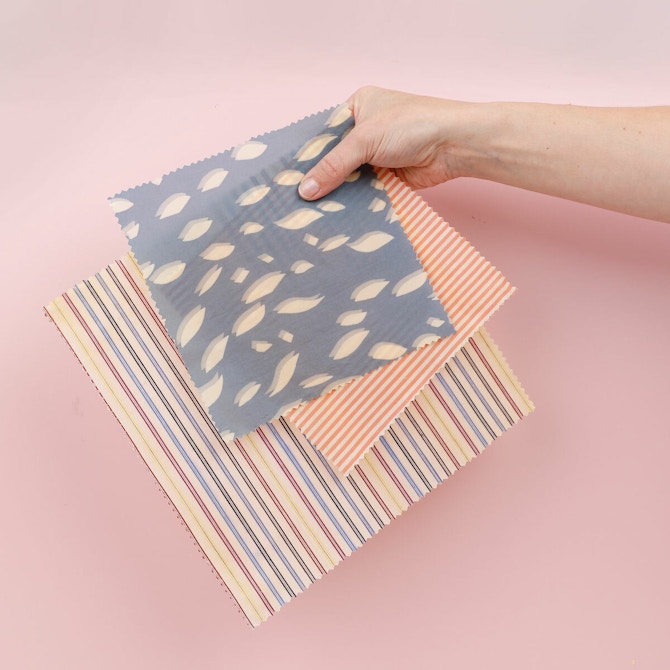
If you're keen to try this out, you'll need midweight woven fabric in two rectangular pieces, ours measured 40cm x 60cm each. You'll also need a little extra fabric to cut ties and edging, or to simplify things you could use bias binding for those areas like we did! DIYs like this are a perfect scrap buster, so if you have any pieces of fabric left over from previous projects, now's the time to use them! You could even patchwork together a bunch of smaller scraps to make up the sizes. Don't worry if the size isn't quite exact, this project can adapt to suit the size you want to make, just ensure the two pieces match in measurements.
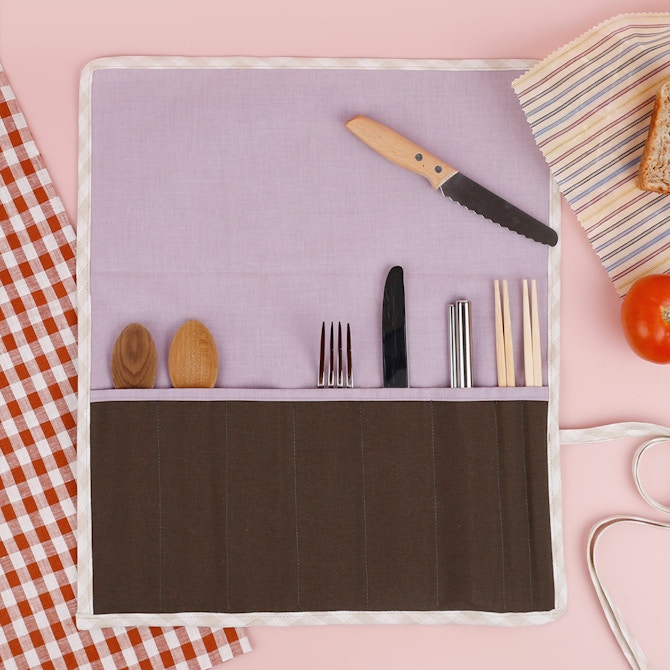
We chose offcuts from previous blog projects, our Heavyweight Linen in Vintage Blush and Bold Linen Gingham in Canary. For ties, we used approximately 1m of Linen Bias Binding, which made the project super quick, cute and professionally finished. This cutlery holder couldn't be easier to make, our two versions took about 2 hours from start to finish, the perfect project for a rainy day!
You'll need:
- Two woven midweight fabric pieces 40cm x 60cm (notes as above)
- Threads to match (or contrast if you wish!)
- Bias binding x1m
- Fabric scissors or a rotary cutter and mat
- Tailors chalk or washable fabric pens
- A sewing machine
- An iron
Shop linen fabrics and bias binding in our Online Store!

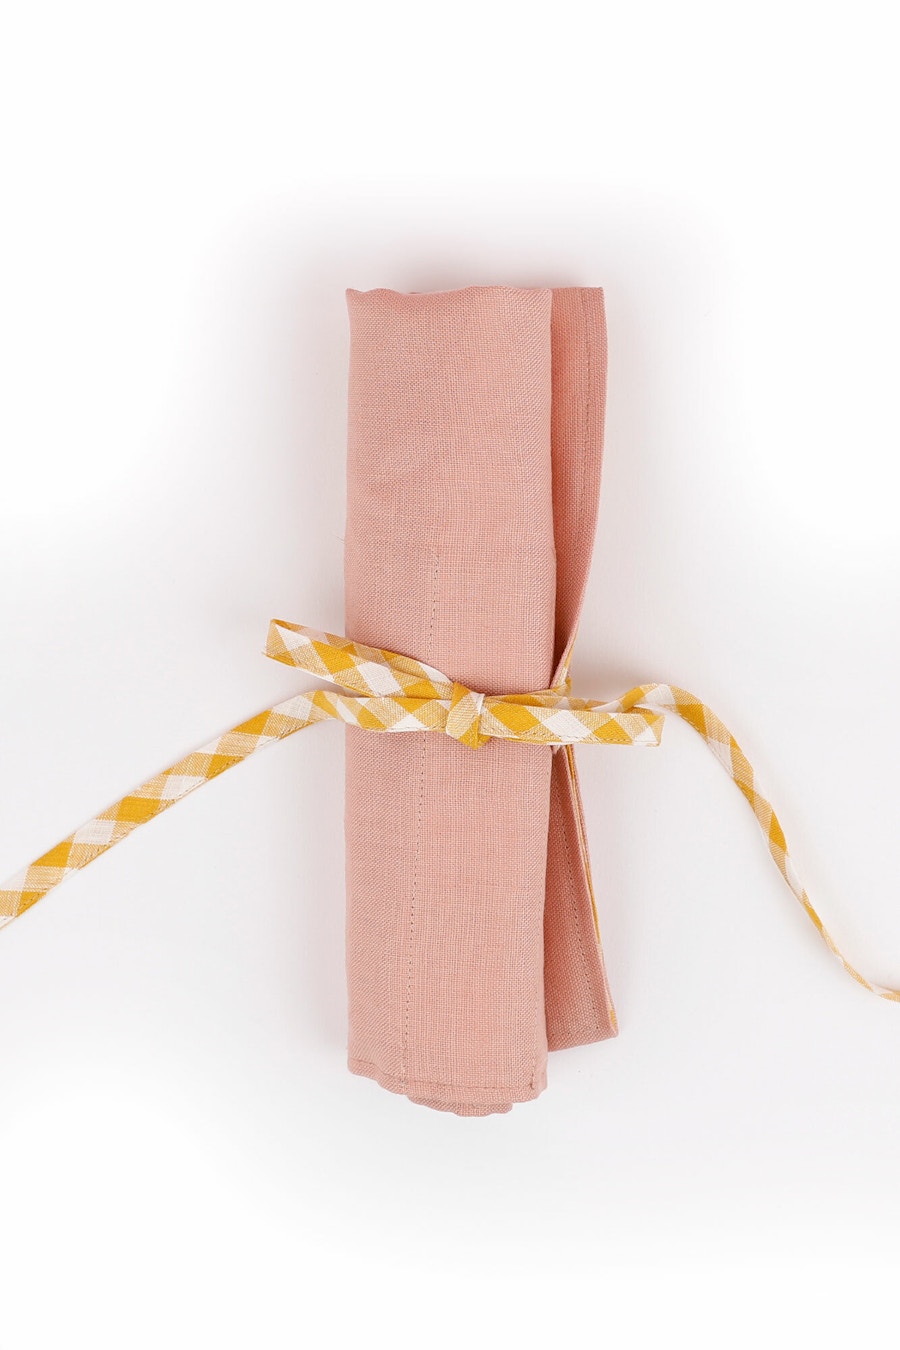
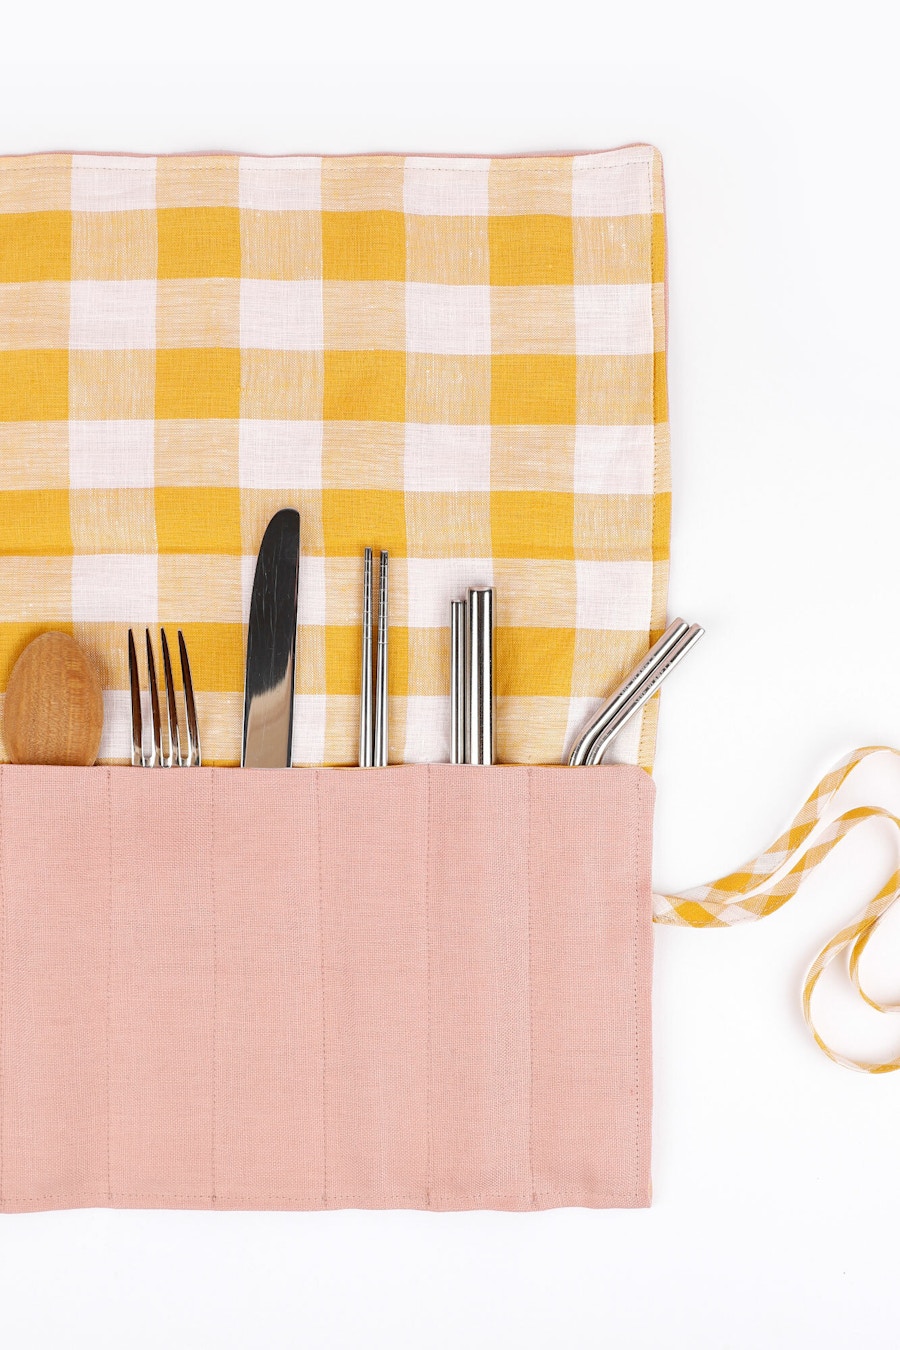
Note, these steps are for making a pouch using bias binding as ties and the measurements match our pink/yellow gingham version above. All measurements are approximate, and you can adjust the sizes as you wish. We recommend washing, drying and ironing your fabrics before you begin, to ensure any shrinkage is accounted for.
- Cut out two fabric rectangles, 40cm x 60cm in size.
- Place the fabrics with the right sides together and make a mark 30cm down the long side, on one side.
- Sew all the way around the edge, leaving an 4cm gap on either side of the mark you made. The total gap will be 8cm and this will let you turn it inside out.
- Turn the rectangle inside out (right sides out) through the gap that you left, and push the corners out with a point turner or something thin and pointed, like chopsticks or knitting needles. Iron the entire rectangle flat.
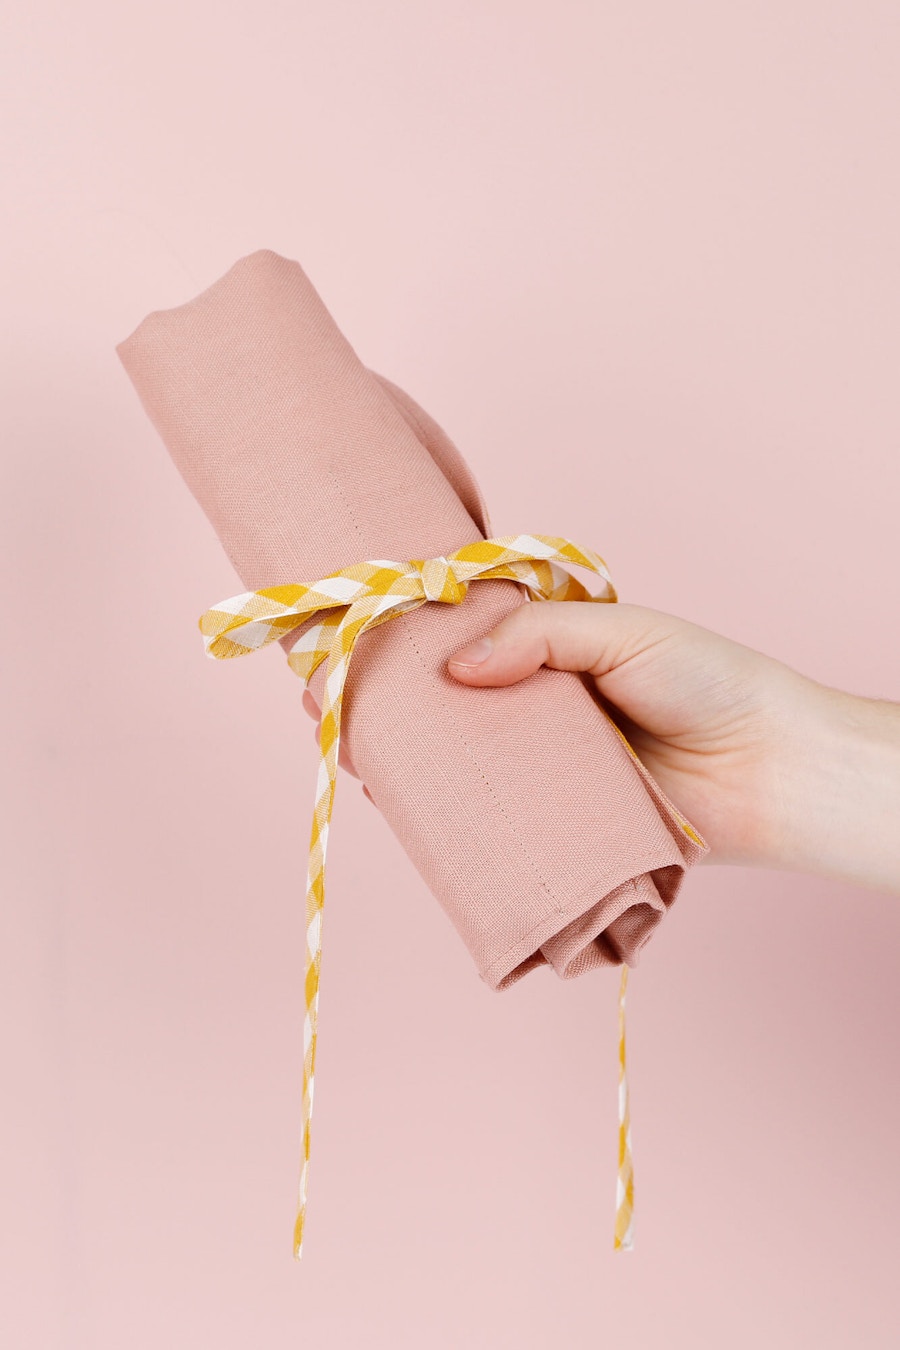
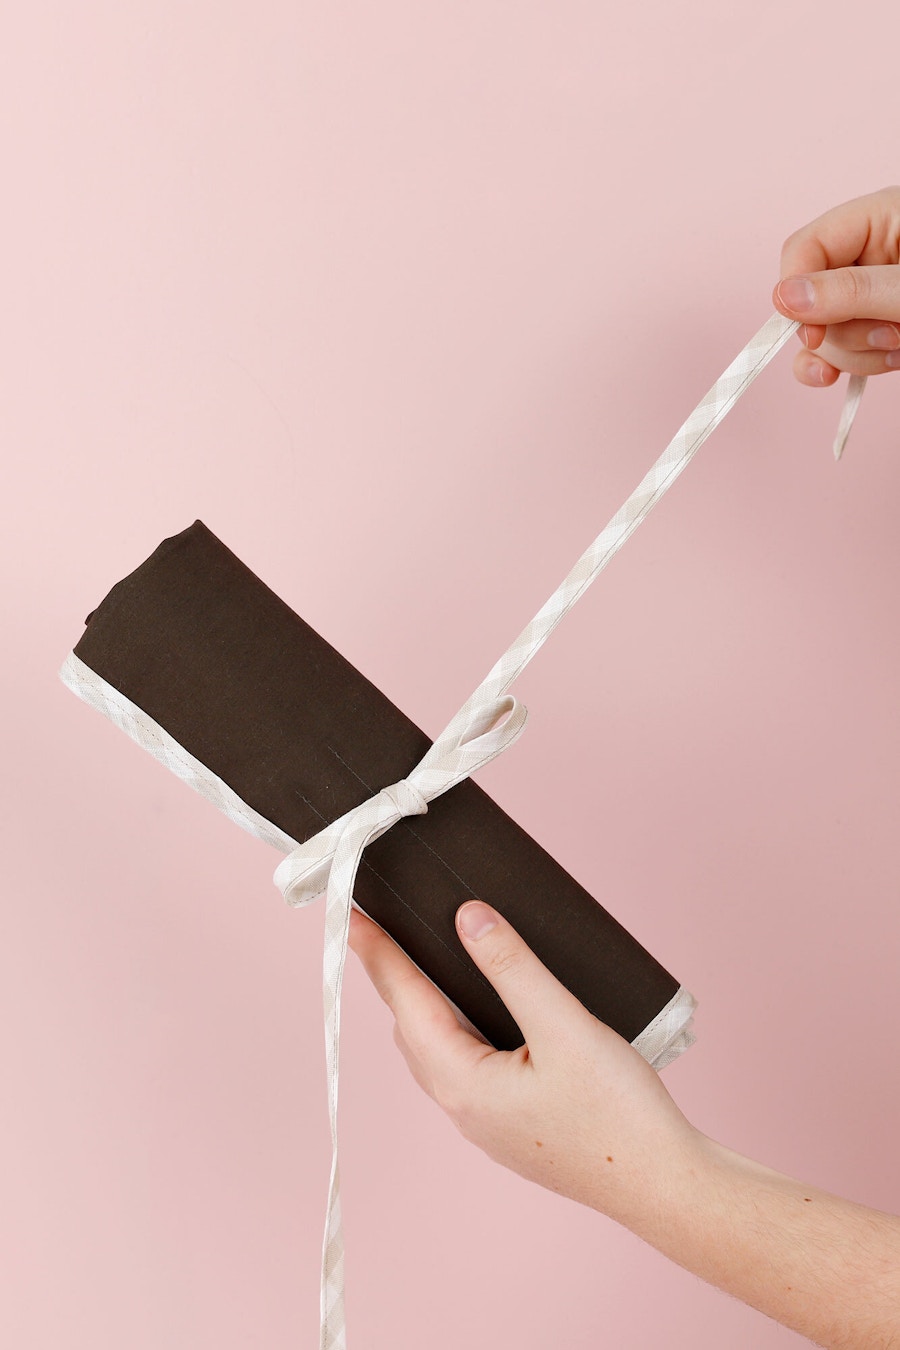
- Take your 1m piece of bias binding, turn back and close each end of each tie. This means you need to top stitch it down onto itself, to ensure the raw edge is not exposed.
- Take your rectangle. If you have contrasted sides, place the rectangle down with the fabric that you want to be the inside of the pouch, facing upwards toward you. Fold the tie in half, and slip it inside the gap that you left, aligning it with the top of the gap. Feel free to adjust where the ties sit, it's up to you! Pin the ties in place.
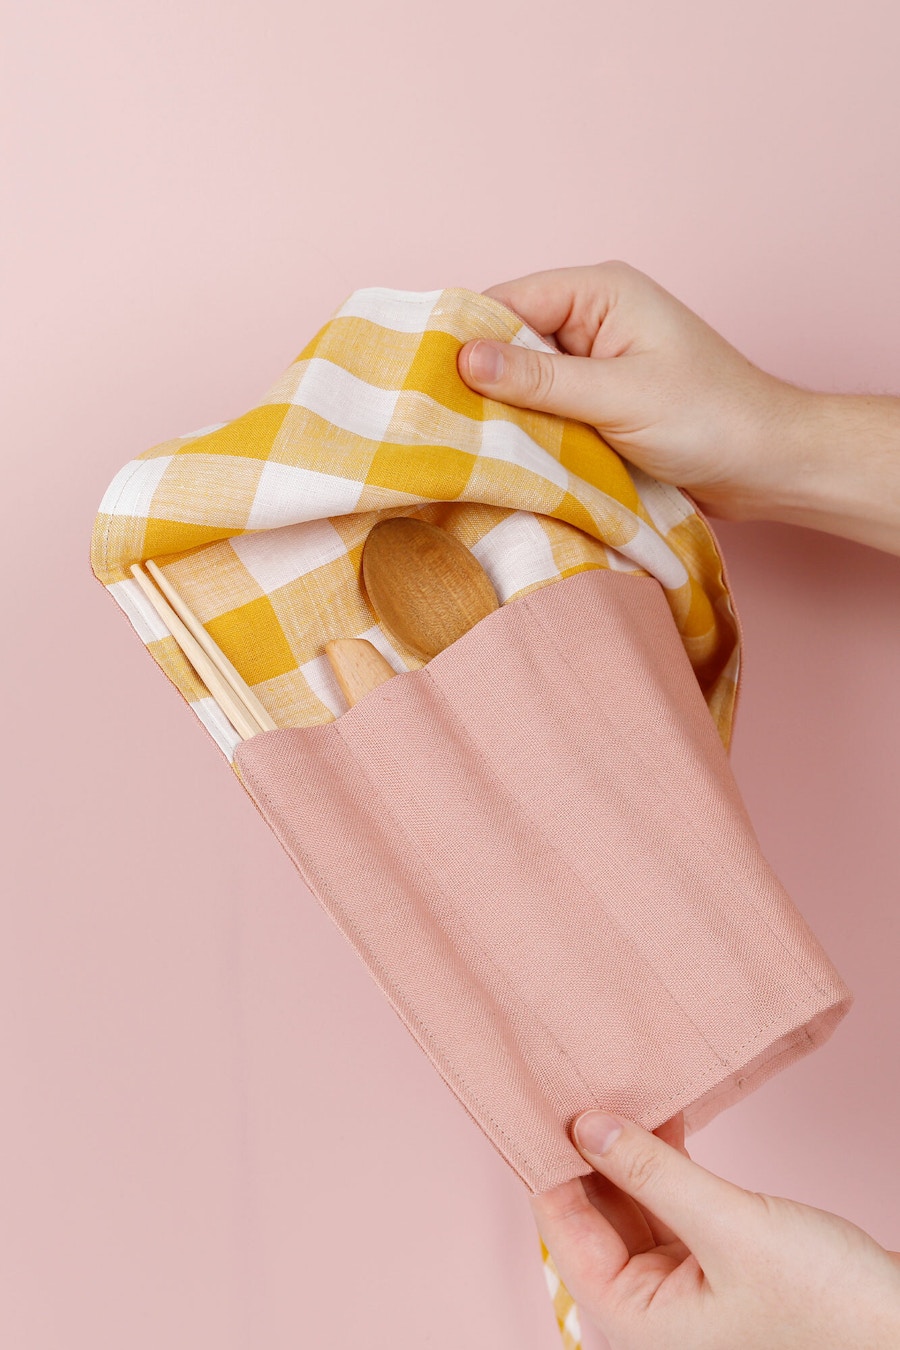
- Measure approximately 20 cm from the bottom edge, and fold this up on itself, this will form the pouch, pin it in place along the edges. Again, you can adjust the depth of the pouch as you wish.
- Top stitch 5mm from the edge, all the way around the entire rectangle, catching the folded pouch sides and ties to secure everything as you go.
- Using a ruler, mark parallel lines at 4cm intervals along the pouch. Then top stitch over the top of these lines, to form the individual holder sections. Ensure you back-tack at the ends to secure the stitch line. You can adjust the interval measurement as you wish, if you have something slightly bigger that you want to be able to carry.
- Give the entire pouch a press, clip and loose threads and voila! Your cutlery holder is complete.
We're loving how these turned out! Our second cutlery wrap was made in our recently arrived reversible bonded cotton — Wisteria, which was even faster to finish than the gingham version. We'd highly recommend giving this project a go if you're wanting to avoid plastic boxes. Share your plastic free DIY projects with us over on Instagram and TikTok using #thefabricstore