Sewing Guides

How To Use A PDF Pattern
21—November 2022
Keen to try a Make by TFS PDF sewing pattern? Read our handy guide for using PDF patterns!
Many sewing pattern brands, including our own Make by TFS patterns, offer PDF download versions of sewing patterns for at home use. To create a PDF pattern, a full scale pattern is laid across many sheets of print-sized paper, and saved as a single file. This file can be printed out at home on any domestic printer or at a local copyshop. Once the pattern is assembled and cut out, it's ready to go! Like many digital products, there are advantages and disadvantages to using sewing patterns in PDF format. Although there is some cost in paper and ink, typically purchasing PDF patterns costs less than hardcopy versions, plus there is no shipping cost! Having a PDF file gives you the ability to reprint any lost pattern pieces, or cut out multiple different sizes. For those who want a quick start, PDF patterns also allow you to download, print, and get your project underway immediately. How convenient!
PDF patterns can be a little intimidating for newbie sewists, or those whose home sewing experience is with hardcopy patterns. Want to try a Make by TFS PDF pattern out? Fear not friend, we’ve put together this guide to help you figure the process out!


When you purchase a Make by TFS pattern in PDF format from our online store, you can choose to download your files immediately after checkout, or by clicking the link that you will be sent in the order confirmation email. Don’t panic if you lose the email, our team can easily send you a new one if you get in touch with your order number. When you do download your pattern, we highly recommend saving it somewhere secure. This might be a cloud-based storage folder such as Dropbox, an external hard drive or USB stick, or a newly labelled folder tucked safely away on your computer.
PDF stands for 'Portable Document Format' and they are one of the most commonly used digital file types today. Our Make by TFS PDF patterns come with a few different PDF files, such as their instruction booklets and patterns, all contained within a compressed zipped folder. A zipped folder is simply a compressed version of a folder that doesn’t take up too much space on your device, and allows for quick sharing and downloading. To use the files in a zipped folder, you just need to unzip it!
The steps for this can be a little different depending on the type of computer you are using. On a PC, click and hold (or right-click) the folder, select ‘Extract All’, and then follow the instructions. On a Mac, double click on the zipped folder and it will automatically unzip.
Once you have unzipped your Make by TFS pattern folder, you’ll find the following files. Make sure you save them somewhere secure, now it's time to print!
- A0 pattern files for printing at your local copyshop, split into three size nests (so you don’t need to print all 15 sizes at the same time).
- A4/US Letter pattern files for printing at home, split into three size nests (so you don’t need to print all 15 sizes at the same time).
- Instruction booklet for the pattern
- A printing instructions page
- A4/US Letter pattern templates (if applicable)
We layer our Make by TFS PDF patterns, which allows you to switch on only the sizes you want to print. This can be a handy way to avoid overlapping sizes and makes cutting your pattern pieces easier! Mac Preview doesn’t support layered PDF files yet, so you’ll need to open the A4/US Letter file using Adobe Reader. Select the layers icon and this will reveal a menu of all the sizes contained in the documents. Use the eye icon to turn on or off the sizes you want to print. Always ensure the base layer remains switched on, as this contains crucial information needed for your pattern. If you are wanting to grade between multiple sizes, simply switch on all the sizes you need. Once your pattern is assembled, you can trace between the sizes as you need. Note that your pattern will come downloaded with all the sizes switched on, so if you don't want to use the layer feature, you can just ignore it.


Don't have a printer handy? Our A4/US Letter files are able to be printed at your nearest copyshop and our A0 copyshop files can be printed on a large format printer at most print shops, check with your local to see if this option is available. Printing the A0 file size will save you time trimming, assembling and taping, as many of our Make by TFS PDF A0 patterns only require taping two or three sheets together! Typically you might pay between $4-$7 per A0 sheet.
Copyshop files are copyright protected and need to be opened using Adobe Acrobat, Adobe Reader or Mac Preview. When requesting a print, always ask for ‘100% actual size with no scaling’, to ensure the file is printed accurately.
In Australia, we recommend trying OfficeWorks and here in New Zealand, we usually use Warehouse Stationary. Both businesses allow you to order online and pick up in store, which can make things a lot easier! Be sure to check the 5cm², or 1 inch², box on the first or second page when you pick up your files (pictured below), to make sure it has been accurately printed at the correct scale.

If you choose to print your A4 pattern files at home, the most important factor is getting the scale correct. Be sure to edit your printer settings to print the pages at 100% actual size, do not scale to fit paper size. It's important that you print the first or second sheet (the one that has the 5cm², or 1 inch², box on it — as pictured above) before any other sheets, to ensure your printer settings are correct. Even a few millimetres can make a big difference to the pattern! All our patterns have these two test squares on them for a quick and easy size accuracy test.
Once you have ensured the scale is correct, print off the remainder of your pattern's pages. The pages in an A4/US Letter pattern are then assembled like tiles. Each pattern has a diagram showing what the tile layout should look like once the pages are assembled.

There are loads of different methods for assembling A4/US Letter sized pattern pages, and the method we describe here is just one of many options. You can find some excellent visual examples of PDF pattern assembly on Youtube, including this one here from Amy Nicole, this version from The Last Stitch, and this video by Anita.
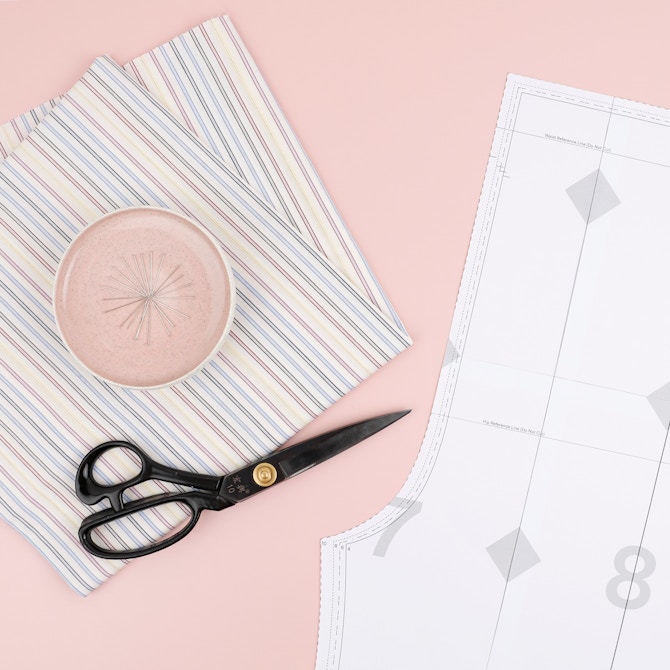
To assemble your PDF pattern, you'll need a pair of paper scissors or a craft knife and depending on the method you choose, either a glue stick or sellotape. The A4/US Letter pages will have a border all the way around the edge. To help you line up the pages accurately, diamonds are placed across each page edge.
Cut off the left side and bottom edges of each sheet, following the inside edge of the borders. Don't cut around the entire page, as you need the border allowance to sellotape or glue the adjacent page onto. Once you have trimmed each sheet, start laying/assembling your pattern in rows, following the numbered assembly diagram. It's always easiest to do one row at a time, and then glue or sellotape them together at the end. As you stick them together, ensure the edges line up as accurately as possible.


Once all of your pattern pages are assembled, it's time to cut the pattern out! Cut along the line of your chosen size or multiple sizes if you're grading between sizes, the sizes are noted next to the lines. The use of scissors will offer the most accuracy, but you can also opt to use a rotary blade paper cutter and a cutting mat. If you have a pattern notcher handy, you can cleanly clip all the notches on your pattern pieces too. After you've cut the pattern out, you can move ahead with your sewing project!
If you're yet to try a Make by TFS PDF pattern, we highly suggest giving it a go! Don't forget that we have in depth visual sew alongs available for every Make by TFS pattern too. You can find these using the top left menu within the blog here.
If you need help along the way, drop us a line via patterns@thefabricstore.co.nz


