Make by TFS

1 — Pressing Before You Sew
08—July 2020
Sewing up your own Make by TFS Lucie Robe? Start our Sew-Along with the Pressing Before You Sew steps here!
We strongly recommend using an iron to press your pieces where required, before you begin sewing. This helps to ensure accuracy when sewing and to give a clean and tidy finish.

Take the two front pieces and, as indicated by the notch at the hem edge, press the centre front edge under twice at 1cm, towards the wrong side. The total amount folded is 2cm, with a 1cm finished fold. You will have a triangular piece of fabric protruding at the neck edge, we will come back to sort that later!


Next we will fold up all the hems. On the fronts, press up the seam allowance 1cm towards the wrong side, then back again a further 4cm in line with the notches.


Repeat for the back pieces and both sleeves. You may find it helpful to cut a 4cm wide strip of heavy card to help guide your pressing!

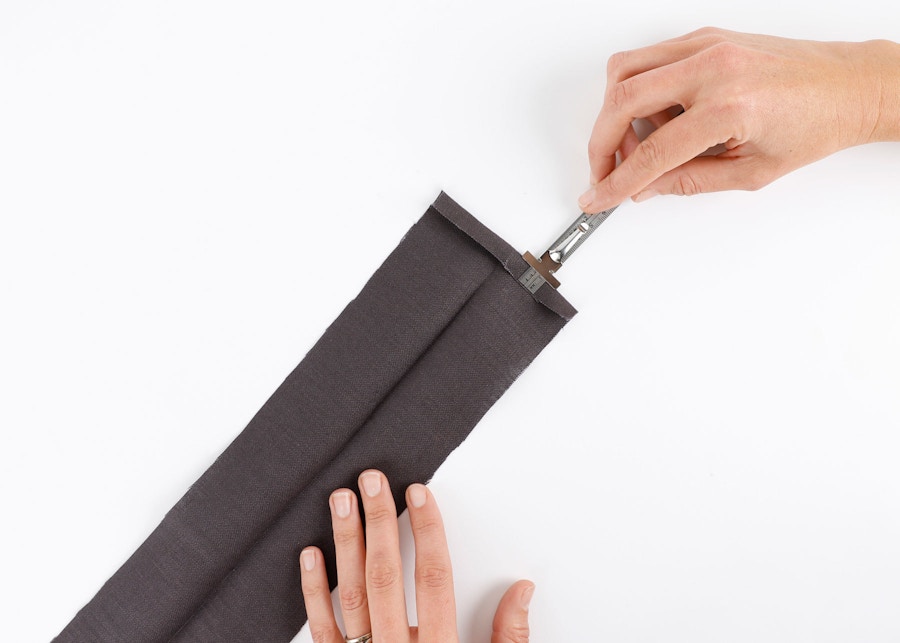
Take your collar pieces and press them in half lengthways with the wrong sides together. Next, fold back the 1cm seam allowance along one long edge on each collar piece. Make sure to fold back the opposite edge on each piece so you have a pair (i.e. the pieces are mirrored).

Press your waist tie pieces in half lengthways at the notches indicated, with the wrong sides together. Then press the outer short sides of the waist tie under 1cm (not the centre edges the that have two notches).

Fold your pocket pieces in half at the centre notches with the right sides together and press.

Lastly for the pressing, take the back neck and waist tie loop pieces and press them in half. Unfold and press 1cm on each side to the centre crease line and fold in half lengthways and press again. The pressed pieces will measure 1cm in width.
Once you have done your pressing, move on to sewing your front panels!


