DIY Projects

Ruffle Bag
04—December 2024
Hello cutie! Download this free DIY template to make your own ruffle bag!
We recently spotted some dreamy plaid ruffle bags on our Pinterest feed and thought we'd try our hand at recreating the look! Putting this DIY together was super satisfying and offers a beginner-friendly project that requires less than a metre of fabric. The perfect gift for DIY lovers! Join us below for a breakdown of the steps + a downloadable template to make your own.


Download the Ruffle Bag template from our open-access drive here.
This little bag best suits midweight woven fabrics! Check out the pattern and print out the pieces, as the amount you will need will depend on the width of the fabric you choose. The pieces are small, and the ruffle and drawstring can be made by joining short pieces of fabric together. This means it'd make a great scrap buster if you have odds and ends from previous sewing projects lying around. We used approximately 50cm of our 151cm wide Cotton / Tencel Check - Beige Mix and 75cm of our 108cm wide Two Tone Check Silk / Poly Shantung - Tangerine Tango. Both of our bags were lined with the same fabric as the outer, but you could also switch it up too if you'd prefer. The main bag pattern piece included in the download makes a curved bag shape, like ours pictured, but you could easily adapt this shape as you wish!
You'll also need a spool of matching thread, a pair of sewing scissors and a sewing machine. Something long and pointy like a knitting needle might also be helpful to turn out the drawstring!

Step One — Sew the Ruffle
- Fold the ruffle piece in half (right sides together) so the long cut edges meet, pin to secure, and sew both short ends.
- Turn right side out and press.
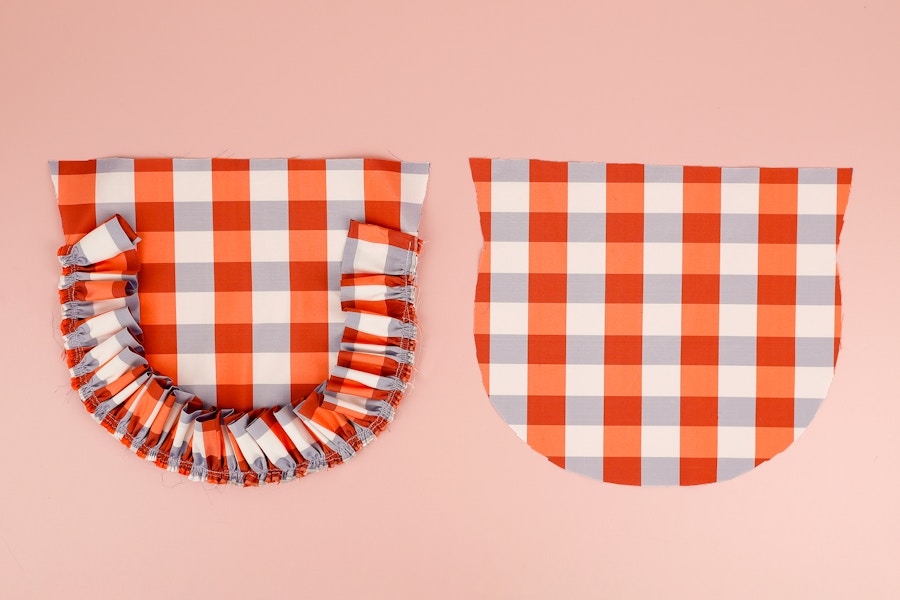
- Sew two lines of a loose gathering stitch along the long-cut edge of the ruffle and gather evenly, checking as you go to ensure it fits nicely around the rounded bottom of the bag (avoid the bag opening).
- Pin the gathered ruffle to the right side of the bag pieces. Make sure the cut edge of the ruffle lines up with the cut edge of the bag piece and the folded smooth edge of the ruffle facing towards the centre of the bag.
- Attach the ruffle piece to the bag along the second gathering stitch line.
- Take the second bag piece and pin it to the first piece, right sides together, with the ruffle sandwiched between them. Now sew them together along the inside of the row of stitching, attaching the ruffle to the first bag piece.
- If your machine has the capability, you can zig-zag the edges to neaten them now, and then turn the bag right side out, and give it a press! You can also use an overlocker to neaten.


Step Two — Sew Pockets and Lining
- Take the pocket piece and zig-zag stitch around the edges to neaten.
- Fold the sides and bottom edges in towards the wrong side by 1cm and press.
- Fold the top edge over 1cm and press, then fold over again another 1cm and press. Pin it in place!
- Sew two lines of stitching along the top edge. (If you want to put a cute label on your pocket, now is the time to sew it on).
- Place the pocket and pin it to the right side of the lining pieces, about 10m from the top edge and about 7.5cm from each side of the bag piece.
- Sew in place around the edge using two lines of stitching.
- Sew the lining pieces together, right sides together, trim and neaten around the edges.


Step Three — Bag It Out (Join Outer and Lining)
- Turn the outside pieces of the bag inside out and have the lining piece right side out. Place the lining of the bag inside the outer bag. Make sure you have the right sides of the outer bag and the right sides of the lining facing each other.
- Pin the lining and outer bag together along the top and sides, leaving a small gap about halfway up each side this will be where you thread the drawstring, and sew it together.
- Repeat on the other side, only this time leave a 5cm-7cm gap to bag the bag out
- Turn the bag the right way out by pulling the lining and bag outer through the small gap.
- Make sure the corners look nice and sharp, and press both sides of the opening and topstitch around the edge, making sure to leave a gap where the drawstring will go.


Step Three — Sew + Insert Drawstring
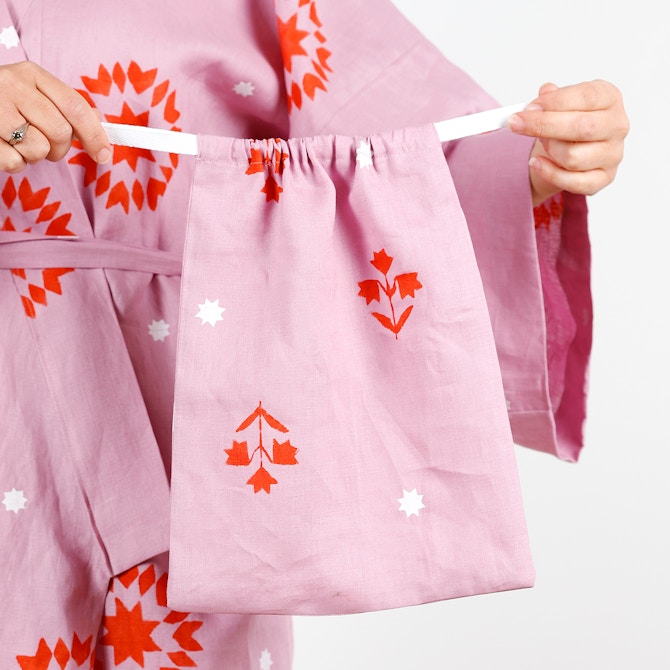
- Fold the drawstring in half longways and press. Unfold and fold in the cut edge to meet in the middle, and press and sew. Make sure the drawstring is narrow enough to fit through the runnel and gap you have left in the bag. Repeat for the other drawstring.
- Sew two lines of stitching between the small openings, making a channel for the drawstring to go. (Repeat on the other side of the bag)
- Using a safety pin, thread the drawstring through the drawstring through the channels on both sides of the opening and either tie or sew the ends together. (Repeat with the other drawstring, this time starting your threading from the opposite side.)
Voila! All done!


