
5 — Back Yoke
19—December 2020
Next we sew our back yoke! This section is for both the Shirt and Dress view.
Now we begin to assemble our garment, starting with the back yoke.

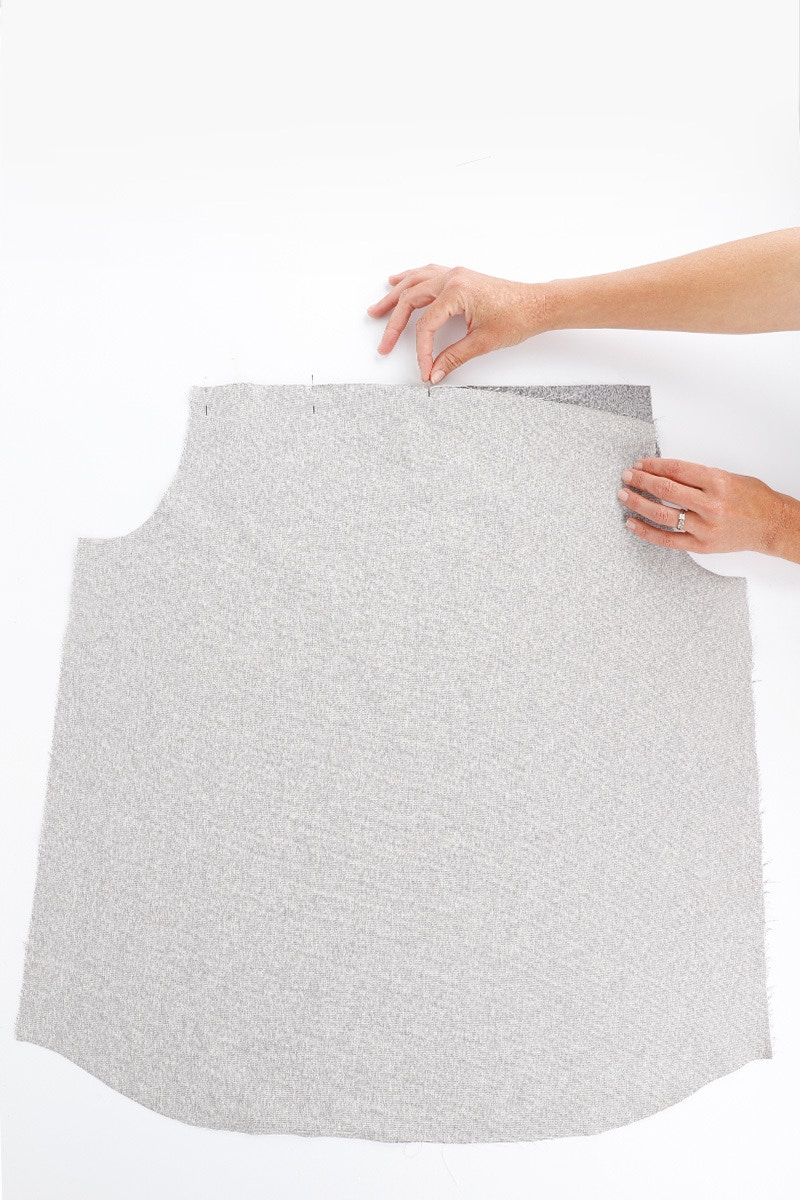
To sew the back yoke, place one of the yoke pieces on the bottom right side up. This is the piece that will be visible from the outside. Lay your back piece on top of the yoke so the right sides are together and pin them together.
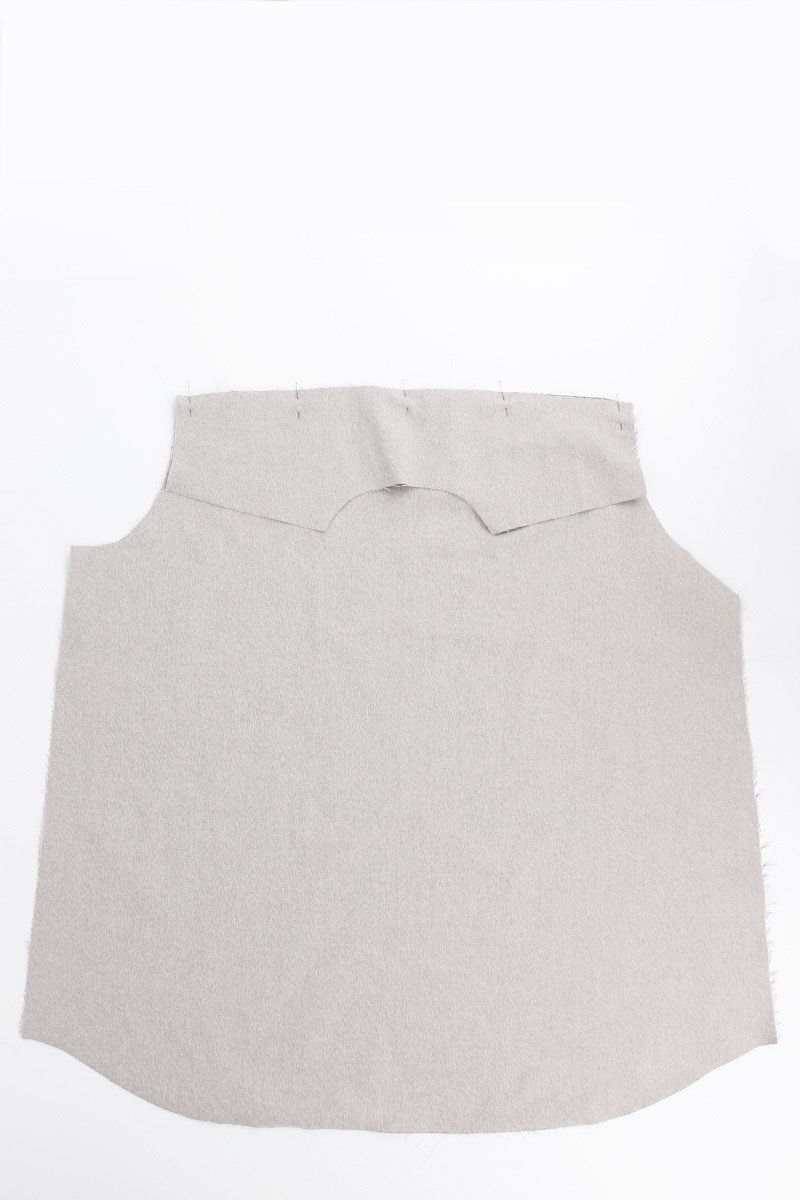
Now place the second yoke piece on top. The right side of the yoke will face the wrong side of the back piece. Pin the three layers together, matching the notches and edges as you pin.
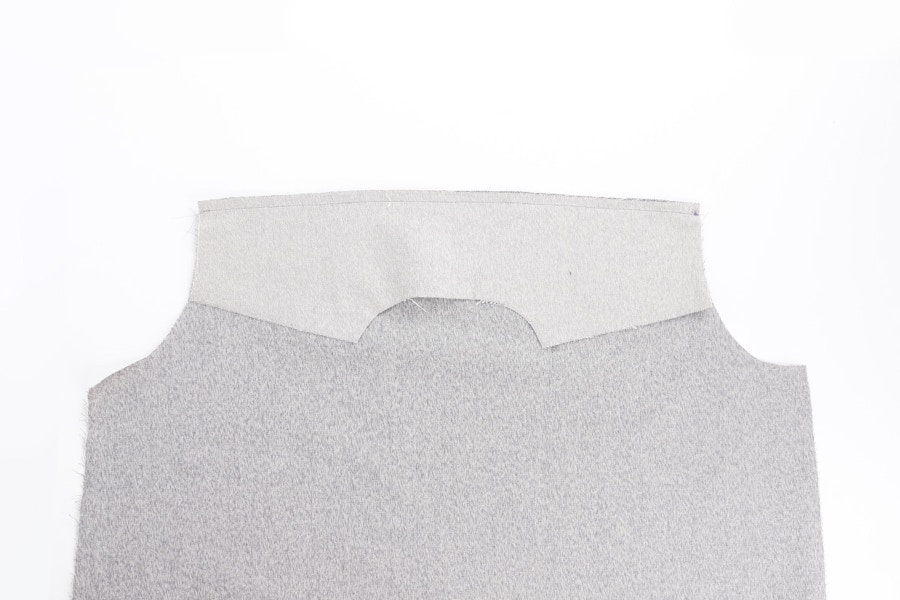
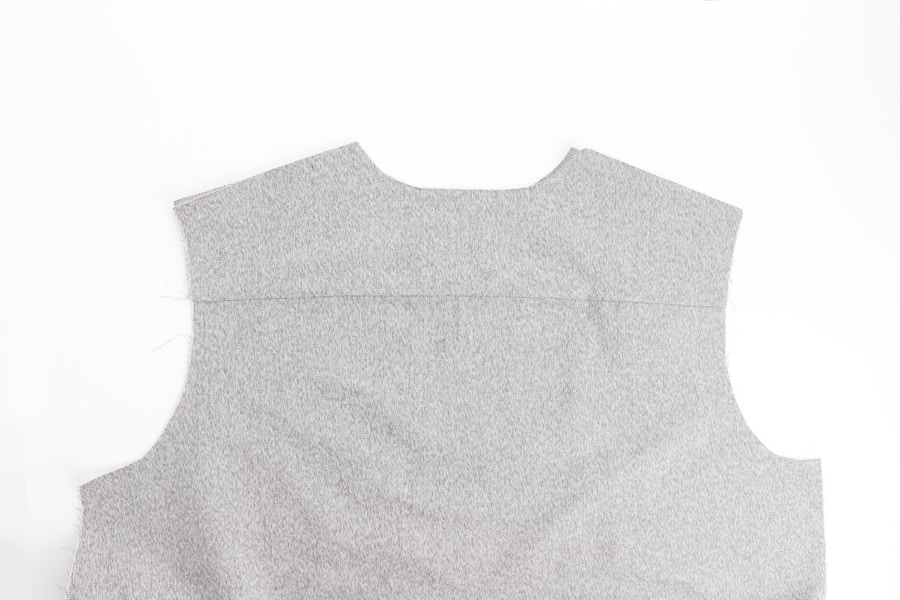
Now, sew through all the layers with a 1cm seam. Press the yoke pieces upwards, with the wrong sides together.
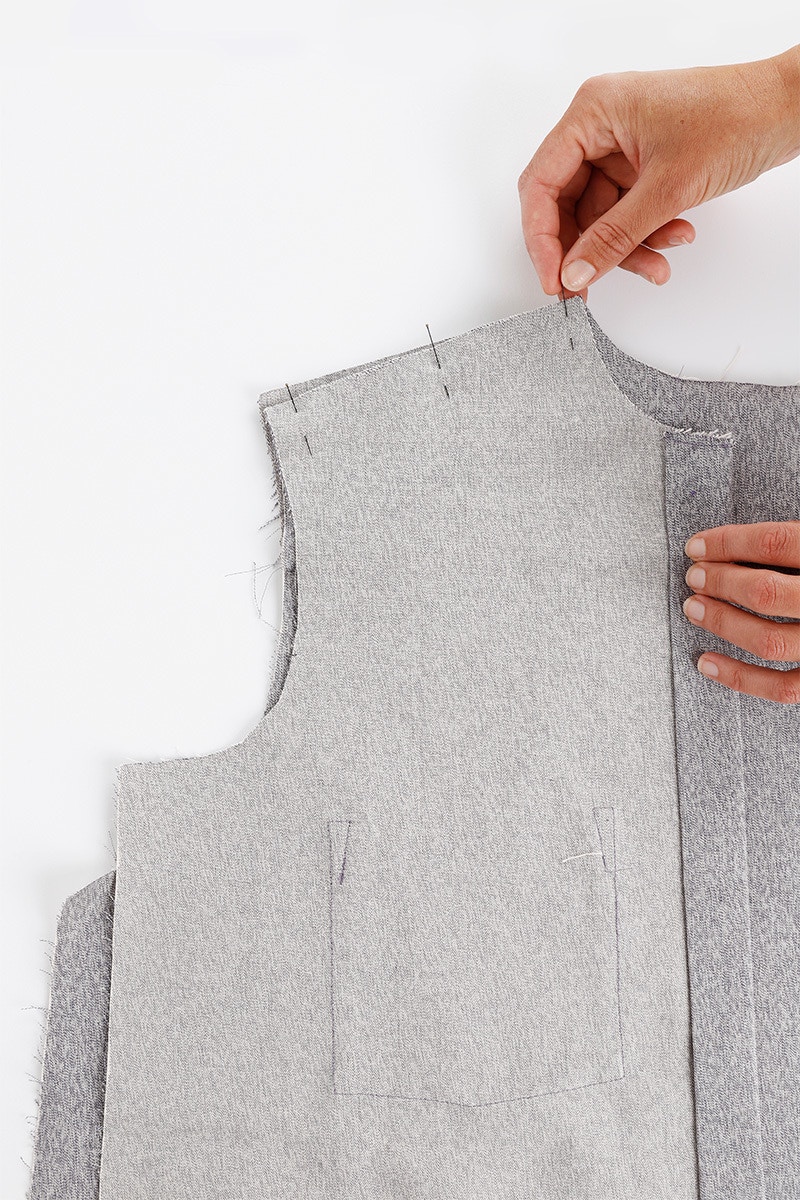
Now we will attach our front and back pieces at the shoulder. To do this, first pin the left outer yoke shoulder to the left front shoulder with the right sides together. Be sure to leave the inner yoke piece free in this step.
Baste the shoulder seams together just inside the 1cm seam allowance.
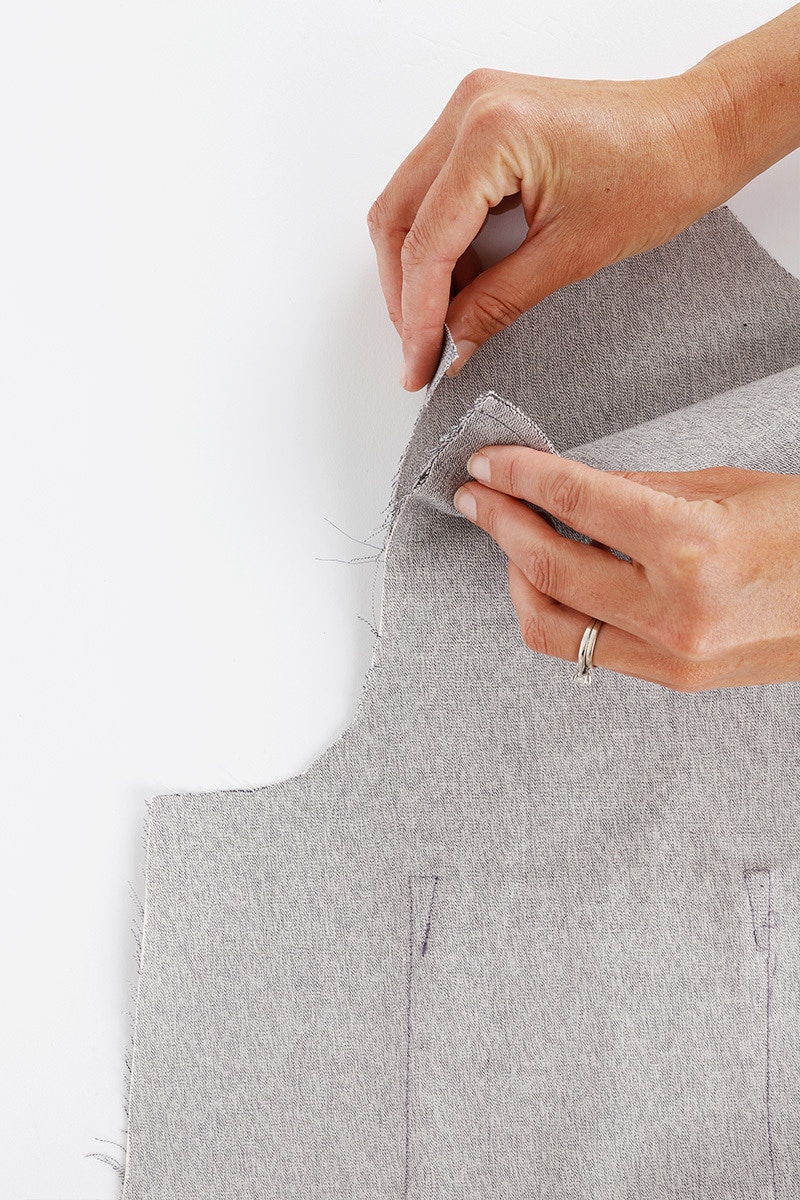
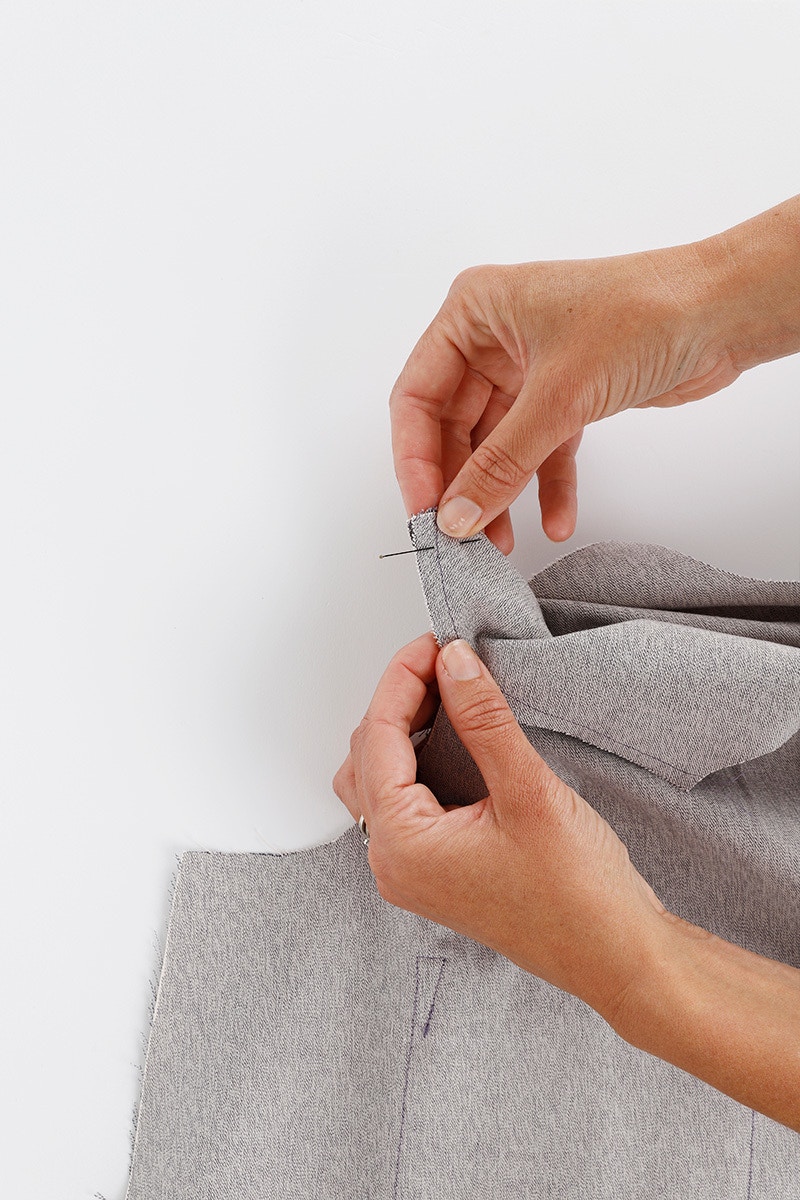
Now we will attach the inner yoke at the shoulder. Working at the sleeve edge, fold your pieces around and pin the right side of the inner yoke to the wrong side of the left front at the shoulder. Your front and back pieces will be pulled into your yoke as you do this.
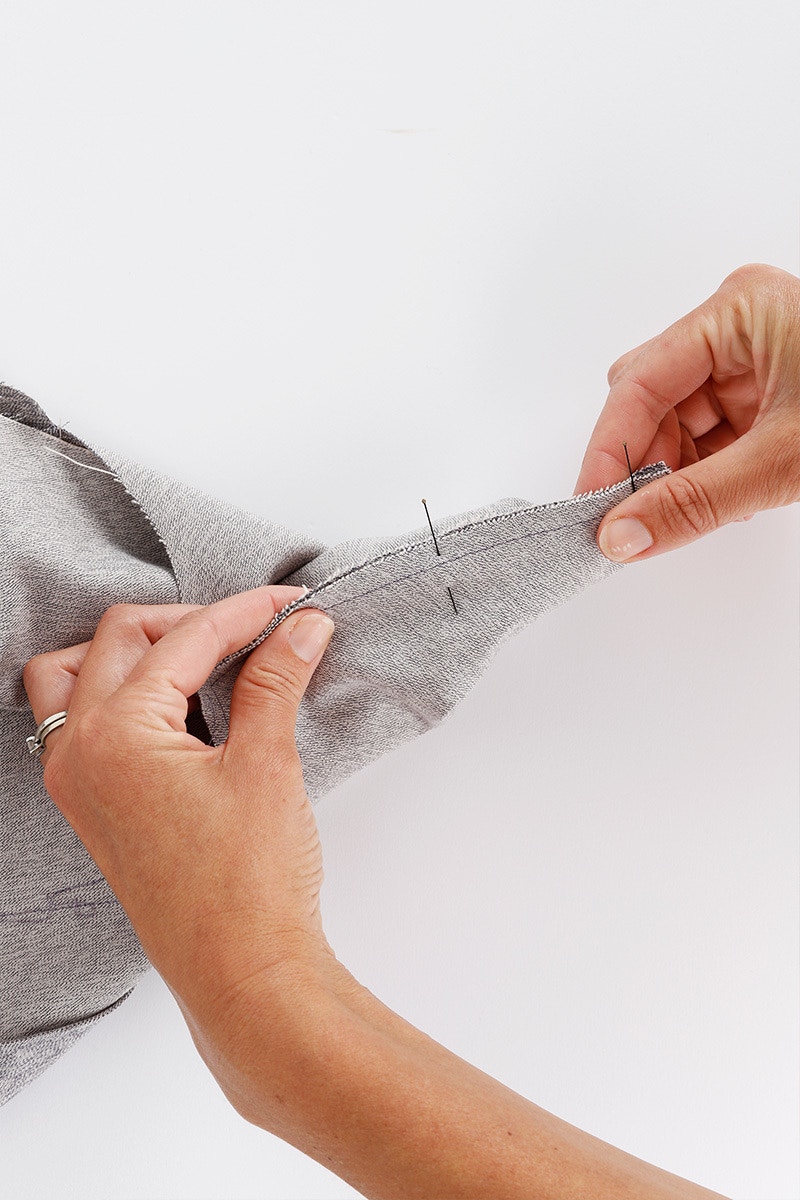
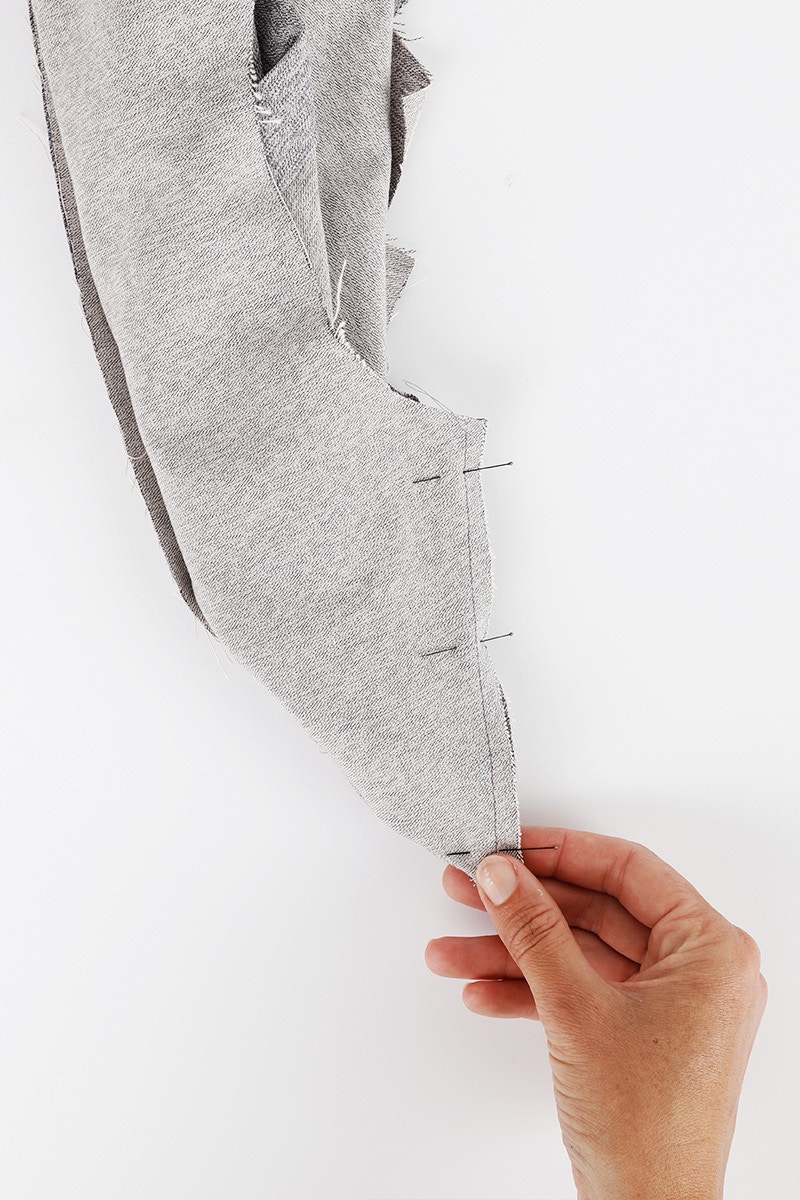
Continue to match the shoulder edges, pinning place as you go. It may require a bit of manoeuvring of your pieces as you do this, especially if you are sewing in a heavier fabric. Be careful not to catch the main body of your front or back piece with as you pin.

Now sew the shoulder seam with a 1cm seam.
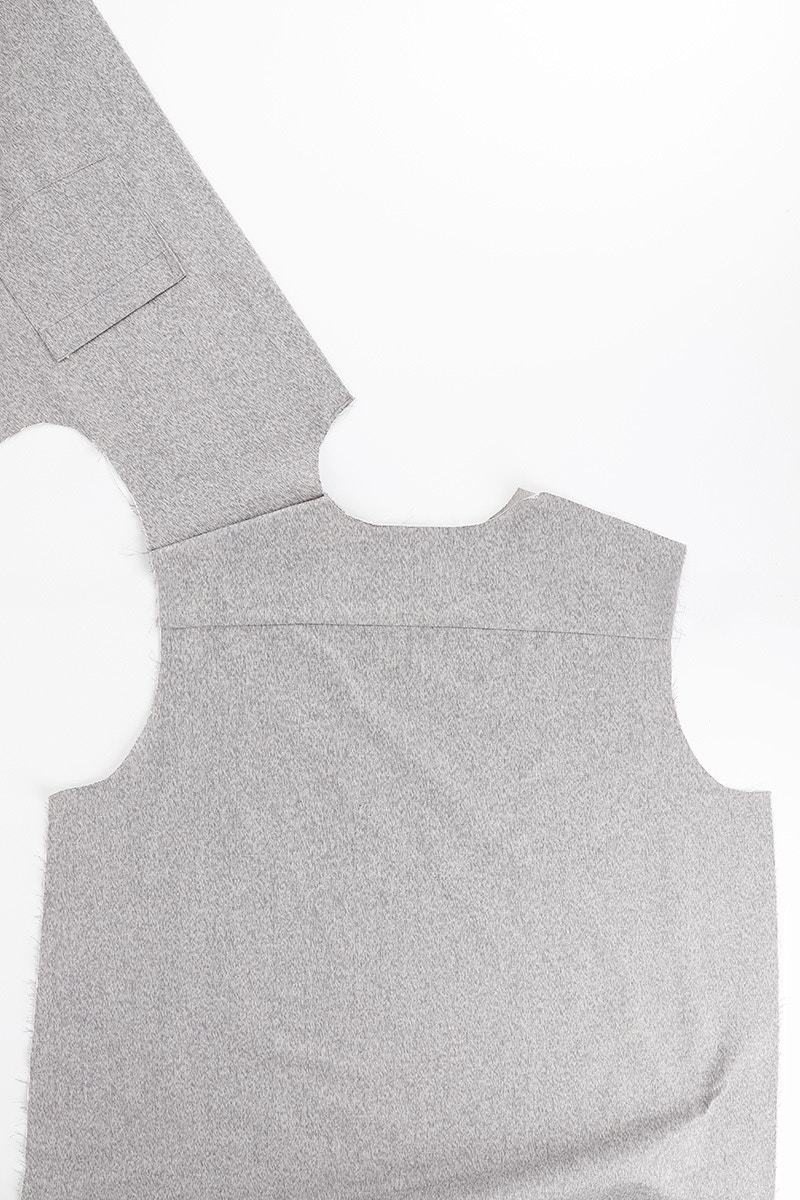
Turn your garment right side out and give it a press.

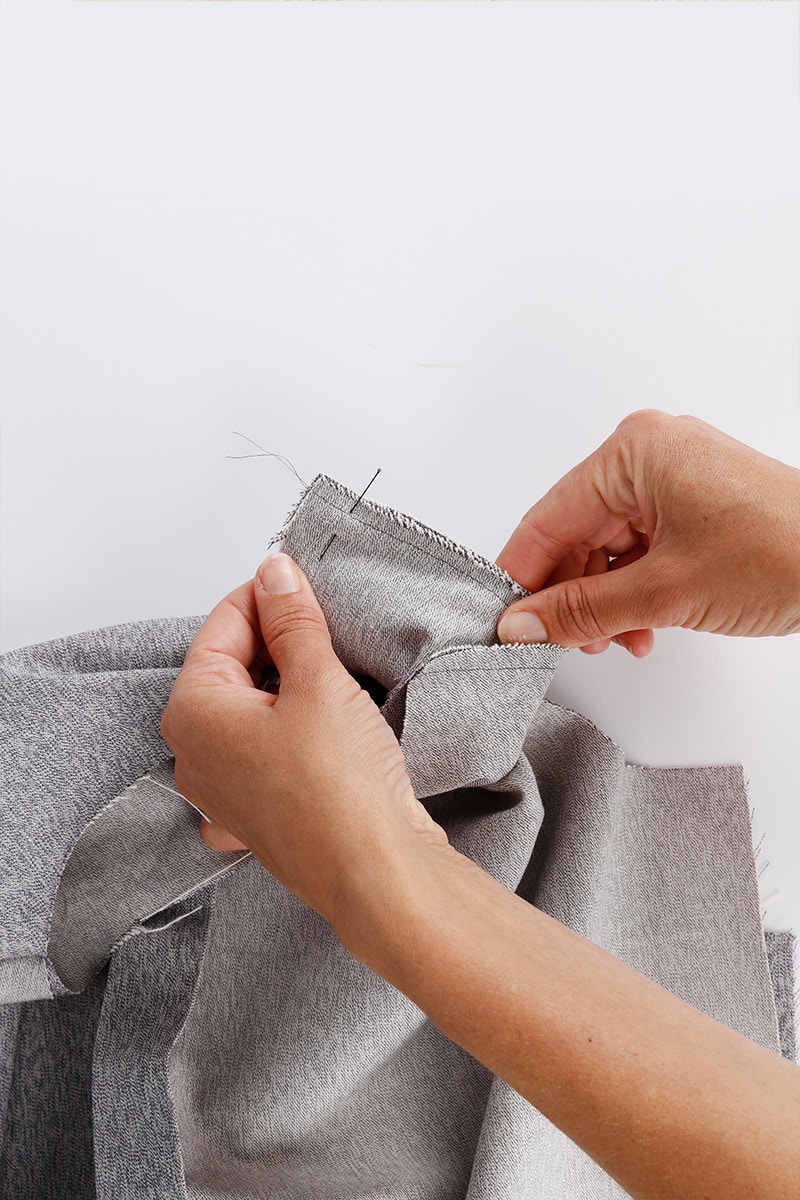
Repeat the process for the right shoulder.
First sew the right outer yoke shoulder to the right front shoulder with the right sides together. Be sure to leave the inner yoke piece free in this step. Baste the shoulder seams together just inside the 1cm seam allowance.
Pin the right side of the inner yoke to the wrong side of the right front at the shoulder. Continue to match the shoulder edges, pinning place as you go. Sew the shoulder with a 1cm seam.
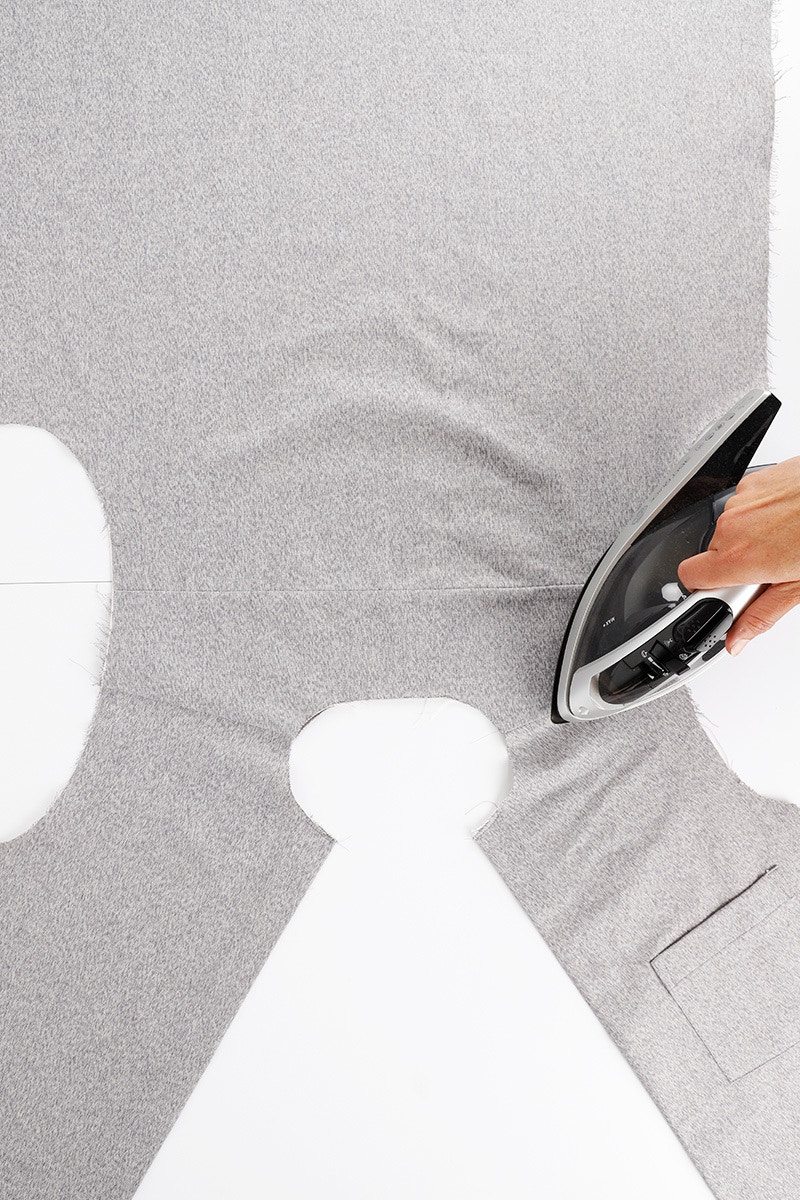
Turn your garment right side out and give your completed shoulders a press!
Next step, attaching the collar!
Don't forget you can always email us via patterns@thefabricstore.co.nz if you need advice!
Bloom makes from our wonderful community are also popping up over on Instagram, follow @makebytfs and use #TFSBloomShirt and #TFSBloomDress so others can check out your creations!


