Pattern Reviews
KATM Mule Tote
15—August 2022
This week we review the Mule Tote pattern from Kylie and the Machine, using suede and natural denim!
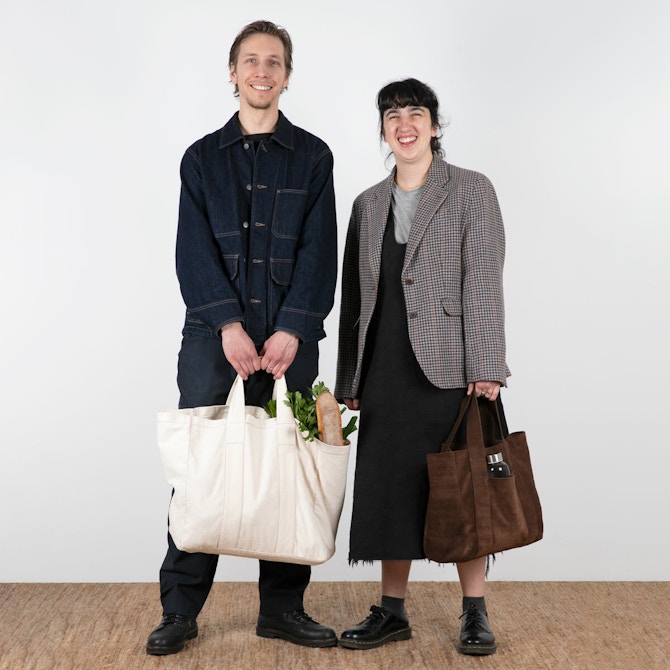
A sturdy #MeMade bag makes a sensible (and customisable) investment for any seasoned or newbie sewist! It's no secret that we're big bag fans, having reviewed a range of patterns here on the blog, including the TYTKA Triangular Tote, the Weekender Bag by All Well Workshop, our recent Lunch Bag by Miss Freckles Design and Grainline Studio's Portside Travel Set. When the Mule Tote by Kylie and the Machine popped up on our Instagram, we couldn't wait to try it! The Mule Tote is a simple, easy-sew pattern that suits a bunch of different fabrics and comes in two chic sizes. Kindly modelled by Ben and Gabby from our HQ team, read on for our review!


Mule Tote — Kylie and the Machine
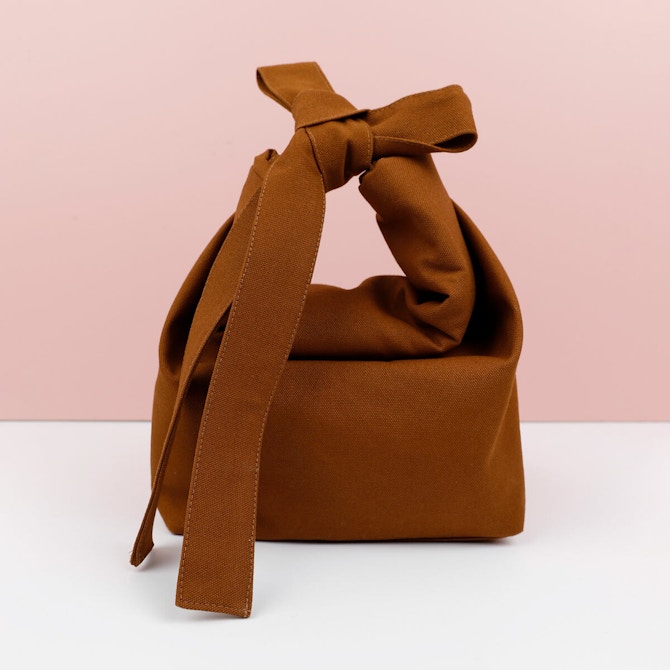
The Mule is Kylie's very first sewing pattern, offering a simple yet chic tote bag pattern for sewists from all experience levels. Kylie sums it up perfectly as a project that "could be done slowly over a Sunday or managed in tiny chunks in the gaps of life". We opted to make two bags, one standard size version made with beautiful rich chocolatey brown Italian designer surplus Martora Suede, and the second a classic maxi size version in our Natural 11oz Upcycled Denim.
For the classic Maxi, we used 1m of the 11oz Upcycled Denim in Natural, with a little under 3m of Gingham Linen Bias Binding - Paprika for the interior bound seams and Gütermann Topstitching Thread in Marmalade #448 for a subtle contrasting pop of colour. We chose to finish our seams with bias binding rather than sewing a flat felled seam, as the denim became quite bulky and frayed a little around the corners. We cut down the 1.5cm seam allowance to 7mm before encasing the seams with the binding. The result of this practical decision looks ultra-cute too, adding a clean finish and fun dash of colour! The maxi has a generous 42cm base length, perfect as a carry-all for those occasions when you just need lots of space!
For the Standard sized version, we used an 11 square foot surplus designer suede hide, which allowed us a little extra for practising on. The actual suede yield was about 80cm x 110cm. We used matching top stitching thread, a leather sewing machine needle and a Teflon foot. We did use an industrial plain sewing machine for this bag, which suited the heavy weight of the suede well.
Overall we thought this was a very well put together pattern with carefully detailed instructions - a dream to follow! This is a project that would be perfect for a beginner with a woven fabric like cotton, linen or canvas. Our suede version was a more challenging material to work with, requiring a little more experience and patience. If you'd like to try it out, read on below for our top leather sewing tips!


Sewing leather does require using a heavier weight thread like our Gütermann Topstitching Thread, a leather sewing machine needle and the use of a foot that easily glides over the tricky surface. Ideally a walking foot is the best option, but otherwise a Teflon foot or a roller foot works well too. Optional but handy supplies also include a rotary blade for cutting, leather glue for the seam allowances, double sided tape to hold things in place such as the straps and clips to use instead of pins.
Choose a Decent Foot —
We used a Teflon (non-stick) foot, and this is typically used to sew fabrics such as leather, plastic, vinyl and suede. The slick surface on the underside of the foot allows for an effortless glide over those tricky fabrics. Set the sewing machine to a medium-long straight stitch for best results when using a foot like this! A Roller Foot can also be used to sew thicker fabrics, napped fabrics, heavy knits, leather, vinyl, or any heavier weight fabrics that are difficult to feed. The foot has two sets of rollers, one large which is to the front and two small rollers at the back of the foot.
Check Your Tension —
You may need to change your thread tension, check your sewing machine guide and have a good test before sewing! We found that using a longer stitch length suited the heavy layers best.
Adjust Construction Method If You Need —
Our suede was fairly thick, making it a little tricky to achieve things like bagging out straps, so we changed up a few construction details too. We created the straps for our suede bag by folding the long strip in half (wrong sides together) and then glued it closed, trimmed off the 1cm seam allowance with a super sharp rotary cutter and then carefully edge stitched along the raw edges of the leather and also along the folded edge too! The end result is a clean flat finish.
We left the edges raw on the inside pockets instead of turning under too, as it was too bulky. The great thing about leather is that it does not fray, so a carefully cut edge will last a long time! We also glued our inside seams, rather than sewing bulky flat felled seams. To do this, we simply cut down one side of the generous 1.5cm seam allowance by half, and then folded and glued the other on top to create a hidden seam on the inside. This seam allowance could also be bound like we did on the cotton bag!
We did struggle a little with the bulk in areas as the corners and where there was more than 3 layers of leather was a little tricky to maneuverer and took a lot of patience (and a broken needle or two). To help the leather sit flat in bulky areas, hammering the seams is a helpful tip! If you try this, be sure to cover your project with a cloth, so you don’t make any marks. Clipping and graduating seams is also helpful too, to minimise bulk.
Practice makes perfect with a leather project, so take the time to ensure your machine is up for the challenge, and test on a few layers of leather beforehand if you can!


Kylie recommends mid-heavy weight wovens for this pattern, such as cotton twill, light canvas, duckcloth and corduroy. The fabric and suede we picked were both on the heavier side, and whilst these bags required a little extra attention and patience, we love the end results! Below clockwise from left to right are our Heavyweight Twill Suiting - New York Pink, Faux Snakeskin - Ivory / Bronze, Italian Cotton Backed PVC - Dusky Lilac, Moire Ottoman Taffeta - Tigers Eye, Stripe Cotton Twill, and PVC Bonded Tartan Cotton - Red.


What a fun project! We like how KATM have offered measurements for those who wish to save on printing, allowing you to draw up the pattern yourself right onto the fabric - a paperless option. This is a truly verstaile pattern and a fantastic addition to any sewists wardrobe. We'd love to see what you're working on, use #TheFabricStore over on Instagram and TikTok!