DIY Projects
Storage Boxes
04—July 2022
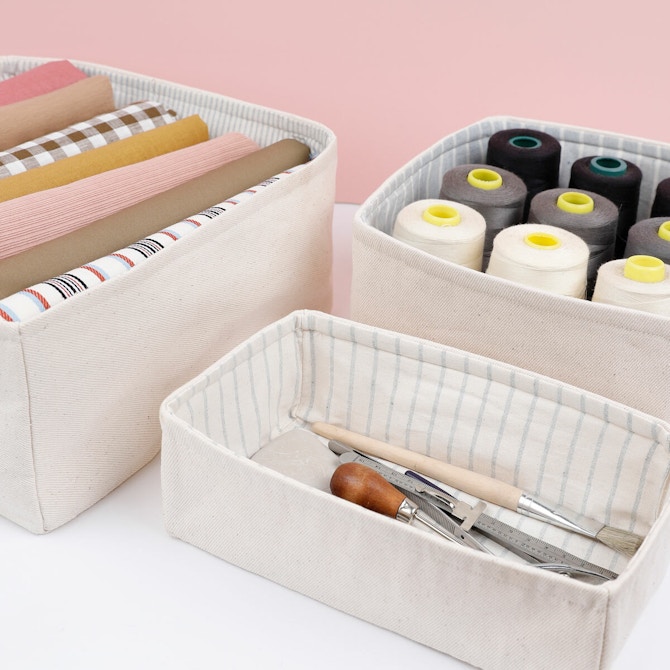
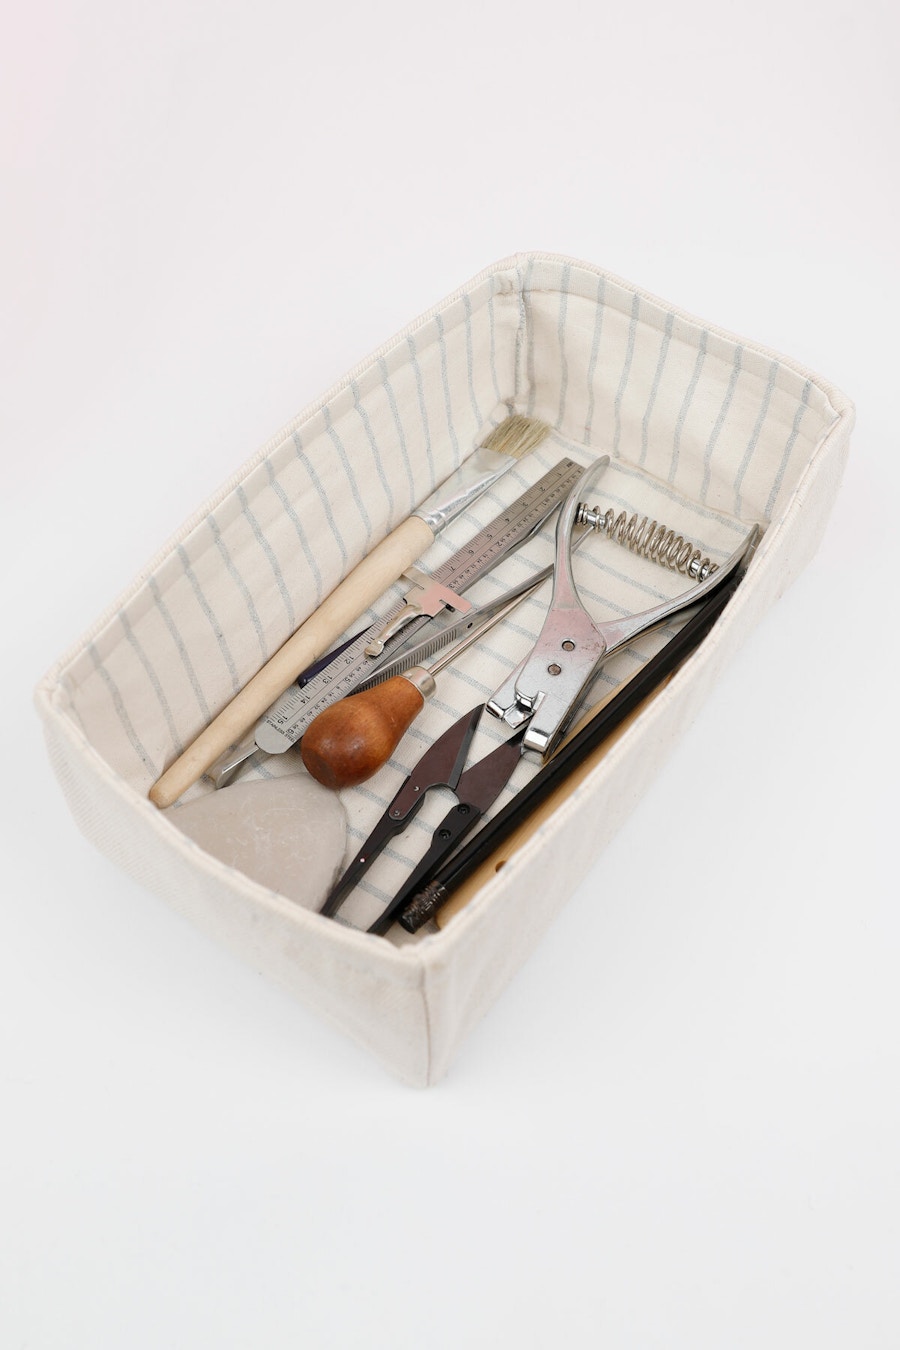
Oh-sew-handy for your sewing space and beyond, this simple DIY tutorial for plastic-free storage boxes using Upcycled Cotton is a must-make!
We recently spotted this great DIY from Create With Jenn over on Youtube, perfect timing for Plastic Free July projects! Storage boxes in a variety of sizes are a super handy way to organise a growing fabric stash, as well as fabric scraps, tools and haberdashery. Boxes like this not only give you the chance to colour coordinate your space, but also provide a practical alternative to plastic bins, which we love! Read on for fabric recommendations, tools and supplies, and the DIY process.

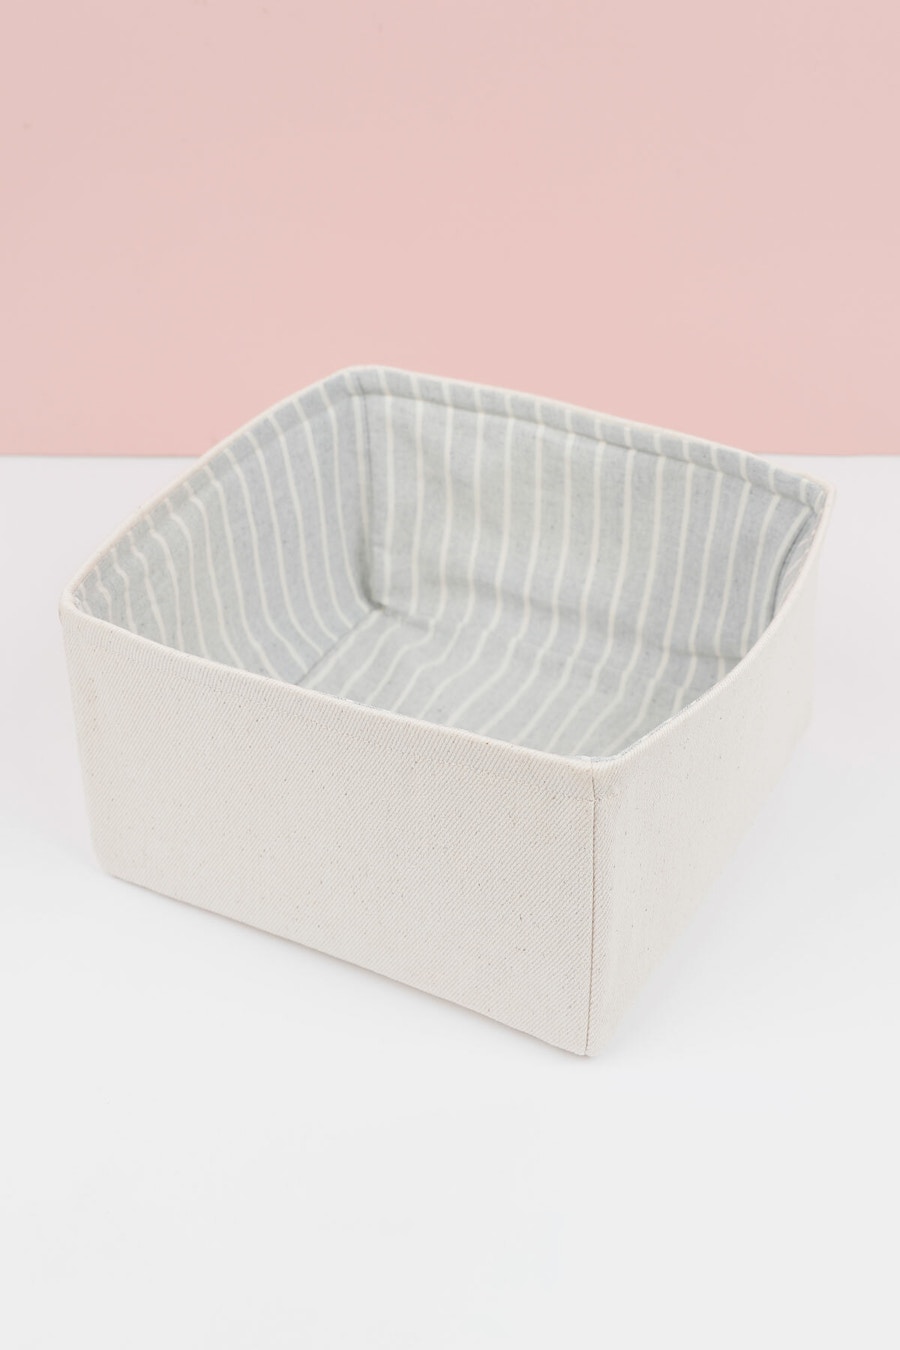
These DIY Storage Boxes require a firm heavyweight fabric for the outer, and a more flexible midweight fabric for the inner lining. You can choose to interface your fabrics for strength too, or add a layer of vilene in between each like we did. For the outer, think heavyweight cottons like canvas, drill or denim. We choose to use our 11oz Upcycled Denim – Natural, a heavyweight fabric with a textured hand feel, rigid structure, a matt finish, and naturally occurring speckled slubs throughout. For the inner, think midweight cottons like poplin, twill or chambray. We chose three of our Upcycled Cotton Chambray stripes, tonal deliciousness!
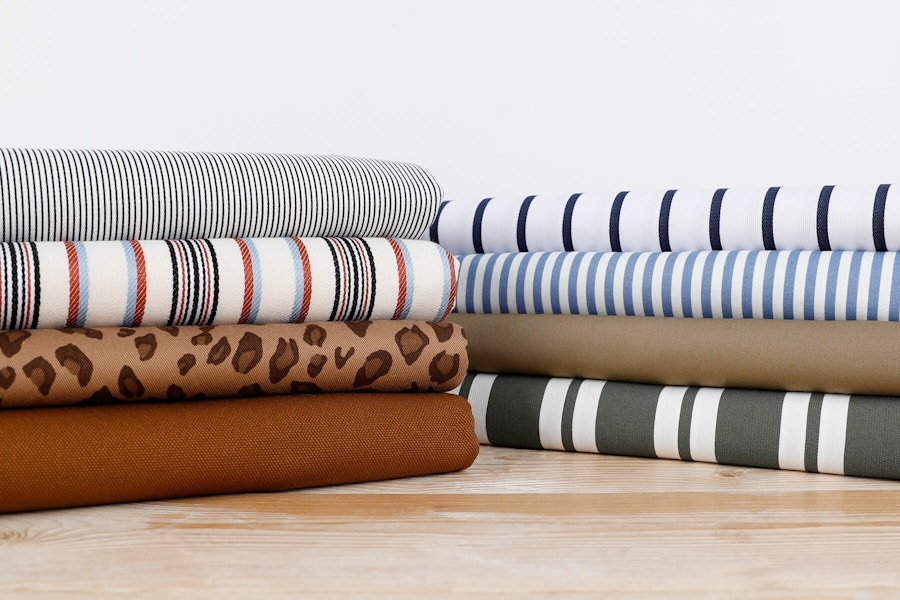
Check out the below suggestions over in our Online Store too, from left to right, Fine Stripe Stretch Cotton / Modal Twill - Black, Woven Stripe Stretch Cotton Twill - Cream Mix, Leopard Print Stretch Cotton Drill - Espresso, Cotton Blend Canvas - Cinnamon Stick, Weft Stripe Cotton Canvas - White / Navy, Printed Stripe Stretch Cotton - Blue, Fine Cotton Twill - Fallow & Awning Stripe Cotton Poly - White / Green.
To make a storage box, you'll need sturdy fabric, lining fabric, threads, fusing (optional), vilene (optional), pattern paper, pencil, chalk or fabric pen, iron and ironing board, fabric scissors, and a sewing machine.

For this tutorial we made three fabric storage boxes - small (12cm x 22cm), medium (20cm x 20cm) and large (28cm x 28cm). These steps follow the measurements to make up one square medium sized box, and once you have made one you can simply adjust the measurements to create other sizes!
For one Medium Square Box, draw and cut two paper pattern pieces. One for the base at 21cm x 21cm and one for the sides at 13cm x 21cm. This includes a seam allowance of 0.5cm around all sides. Once you have your pattern pieces cut, now is the time to block fuse your outer and lining fabrics, if you wish to do so. Next you'll need to cut the below fabric pieces out. It’s a good idea to mark notches in the centre of each side end to make it easter to align when sewing!
Base — Cut out 1x in outer fabric, 1x in lining fabric and 2x in vilene (if using)
Sides — Cut 4x in outer fabric, 4x in lining fabric and 8x in vilene (if using)
Top Tip — You may want to test out your fabrics before cutting, to ensure they will be rigid enough. We made up a small sample of the layers to test out the structure, and found we needed to add the vilene layer for added structure.


Sew two layers of vilene to the wrong side of all outer fabric pieces, using a 3mm edge stitch. Next, sew the 4 sides together, attaching the smaller ends to one another (right sides together) with a 5mm seam allowance. You should be left with a square shape like the one above when complete! Sew the 4 sides of the lining box together in the same way.


Pin the sides to the base by aligning the corners of base with the sewn side seams. Sew around the square base with a 5mm seam allowance, and pivot at each corner. Turn your box through and press, you may need to clip into the corners to remove bulk and use the steam setting on your iron.
Sew the outer and the lining up separately - at this point, you'll have two boxes! When sewing the lining, it's important to leave a gap of approx 6cm in one corner to use to turn though.

Pin the top edges of the box and lining together, with the right sides together, by placing the outer box inside the lining box. Make sure outer box has right side out and lining has wrong side out! Align corners and sew at 5mm.

Turn the box through the opening in the lining and press to finish! Sew up the opening in the lining with a small edge stitch. The final step is to sew around the outer top edge to hold the box in place. We stitched ours at 1cm. An optional finishing step is to secure lining to the outer at the base by stitching in the ditch around the main and lining seams.
Press each side to finish!

We're loving how these turned out! The video tutorial is a game changer, we'd highly recommend giving this project a go if you're wanting to avoid plastic boxes. Share your plastic free DIY projects with us over on Instagram and TikTok using #thefabricstore